Sunday, December 18, 2011

Chocolate Pecan Bars

My friend and I have baking 'dates' once in a while, and these are what we made during one of them. I liked them so much I even made them again a couple weeks later and ate about 1/4 of the pan by myself. In one sitting. Maybe I shouldn't disclose that kind of stuff...but let's be honest. They're good. They're even better still warm from the oven on top of some vanilla ice cream. These are so easy to make, the hardest part is waiting for them to cool. But since we're on the whole honesty thing..I don't actually let them cool. They come out of the oven and i'm waiting with a spoon in hand. Skip the traditional pie this Christmas and just go with the bars :)

Chocolate Pecan Bars


Ingredients:
For the Crust:

1½ cups all-purpose flour

½ cup (1 stick) butter, softened

¼ cup packed brown sugar


Filling:

3 large eggs

¾ cup corn syrup

¾ cup granulated sugar

2 Tablespoons butter, melted

1 teaspoon vanilla extract

1¾ cups coarsely chopped semisweet or bittersweet chocolate (I just used chocolate chips)

1½ cups chopped pecans


Directions:
1. Preheat oven to 350°F. Grease a 9×13-inch baking pan.
2. For the crust, mix together the flour, butter and brown sugar until crumbly. Press into the baking pan and bake for 12-15 minutes or until lightly brown.
3. For the filling, beat the eggs, corn syrup, sugar, butter and vanilla extract with a wire whisk. Stir in the chunks and pecans. Pour evenly over the baked crust and bake for 25-30 minutes or until set.
4. Cool in the pan on a wire rack. Cool completely and cut into bars. Store in an airtight container at room temperature.
Follow TawnyAlexander on Twitter

Friday, December 16, 2011

Praline-Pumpkin Cake

I mainly decided to make this cake because I happened to have a yellow cake and some extra pumpkin on hand when I wanted to bring a 2nd dessert to a church dinner. It actually turned out really good and I had several people tell me that. Matt didn't know I had made this cake and when he went to choose a dessert (there were about a million, too) he ended up picking this one. However, I don't know if i'll be making it again since i'm a chocolate girl. It takes a lot to win my heart over if it's not chocolate. Be warned though, that this cake feeds a small army. Originally the recipe calls to be made in 2 8x8 pans, but after reading some people's reviews and some problems they had with it, I decided to just do a single layer in a 9x13 pan.
Praline-Pumpkin Cake
Betty Crocker

Ingredients:
1/2 cup butter or margarine
1/4 cup whipping cream
1 cup packed brown sugar
3/4 cup coarsely chopped pecans
1 box Betty Crocker® SuperMoist® yellow cake mix
1 cup canned pumpkin (not pumpkin pie mix)
1/2 cup water
1/3 cup vegetable oil
4 eggs
1 1/2 teaspoons pumpkin pie spice
1 container Betty Crocker® Rich & Creamy cream cheese frosting
Caramel topping, if desired
Additional coarsely chopped pecans, if desired

Directions:
1. Heat oven to 325°F. In 1-quart heavy saucepan, stir together butter, whipping cream and brown sugar. Cook over low heat, stirring occasionally, just until butter is melted. Pour into two ungreased 9- or 8-inch round cake pans; sprinkle evenly with 3/4 cup pecans.
2 In large bowl, beat cake mix, pumpkin, water, oil, eggs and 1 teaspoon of the pumpkin pie spice with electric mixer on low speed until moistened, then on medium speed 2 minutes, scraping bowl occasionally. Carefully spoon batter over pecan mixture in each pan.
3 Bake 41 to 47 minutes or until cake springs back when touched lightly in center. Cool 5 minutes; remove from pans to cooling rack. Cool completely, about 1 hour.
4 Stir remaining 1/2 teaspoon pumpkin pie spice into frosting. To assemble cake, place 1 layer, praline side up, on serving plate. Spread with half of the frosting. Top with second layer, praline side up; spread remaining frosting to edge of layer. Drizzle with caramel topping and additional pecans. Store loosely covered in refrigerator. Follow TawnyAlexander on Twitter

Wednesday, December 14, 2011

BBQ Chicken Fettucine

Here's a real quick and simple meal for ya. Not to mention deeelicious. It's a fun twist on traditional alfredo with bold flavor and a little spice. It's not often I repeat recipes, but this is one i've made a couple times now, so that's telling you somethin.

BBQ Chicken Fettucine
adapted from Patio Dadio BBQ

Ingredients:
1/2 lb Fettucine
3 Grilled boneless/skinless chicken breasts, sliced in 1/4" slices
1 can (14.5 oz) Diced tomatoes with onion and green pepper
1 jar (15 oz) Classico Four Cheese Alfredo
1/4 cup BBQ sauce
1/4 cup Water
2 tsp Hot sauce
1 tsp Smoked paprika
1/2 tsp Black pepper, ground fresh
1 9. oz bag fresh spinach

Directions:
Cook the pasta according to the package directions while you prepare the sauce.
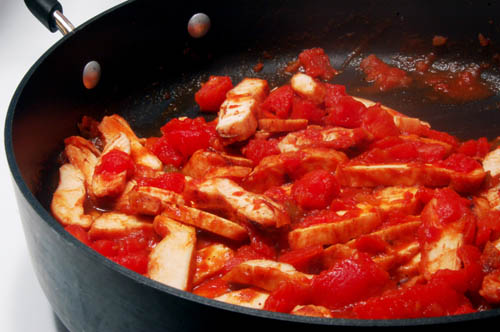
Heat a large pan over medium-high heat and add the can of tomato/onion/pepper. Saute until about half of the liquid has reduced, then add the chicken. Continue sauteing until almost all of the liquid has evaporated.
Reduce the heat to medium and add all of the remaining ingredients, except the pasta. Cook this for about five minutes, stirring occasionally. Be careful to not let the sauce scorch. If that starts to happen, reduce the heat.
Add the drained pasta to the pan and toss well for several minutes. You want the sauce to nicely coat the pasta without becoming too dry. If it starts to get too dry, just add a splash or two of milk. Follow TawnyAlexander on Twitter

Monday, December 12, 2011

Peanut Butter Cups

Matt's favorite candy is peanut butter cups, so I knew eventually I would try my hand at a homemade version. I was pleasantly surprised with how close these tasted to the real thing. Even the texture was pretty spot on. The biggest things I noticed were that the real Reese's pb cups taste saltier and the pb to chocolate ratio was just a tad more in this version. Overall, they turned out great and my plans to share them..well, atleast I had good intentions.
Peanut Butter Cups
Brown Eyed Baker

Yield: About 3 dozen peanut butter cups
Prep Time: 45 minutes Chill Time: 1 hour, total

Ingredients:
1 cups creamy peanut butter
¼ cup unsalted butter
¼ cup light brown sugar
1¼ cups powdered sugar
4 cups milk chocolate chips (two 11.5-oz bags)
¼ cup vegetable shortening

Directions:
1. Line a mini-muffin tin with paper liners; set aside. Line a baking with parchment paper; set aside.
2. In a medium saucepan, combine the peanut butter, butter and brown sugar over medium heat. Heat until completely melted and starting to bubble a little, stirring constantly. Remove from the heat. Add the powdered sugar a ¼ cup at a time, stirring until completely combined with the peanut butter mixture after each addition. Set aside and let cool.
3. Meanwhile, melt the chocolate chips and shortening together in the microwave on 50% power in 30-second increments, until completely melted, stirring after each burst.
4. Using a small cookie scoop or a couple of teaspoons, spoon melted chocolate into the bottom of each lined muffin cup.
5. Use a heaping teaspoon to scoop out the peanut butter mixture. Roll it into a ball, and then flatten it slightly into a disk. Place on the prepared baking sheet lined with parchment paper. Once finished with all of the peanut butter mixture, refrigerate both the muffin tins and the peanut butter patties for about 30 minutes.
6. Place a peanut butter patty on top of each chocolate-lined muffin tin. Then use a scoop or spoon to add more melted chocolate on top and around each peanut butter patty.
7. Refrigerate again for 30 minutes, then they’re ready to serve! Store in the refrigerator or freezer. You can keep at room temperature in an airtight container if you’re going to serve them the same day, but they’ll start to get soft if not at cool room temperature Follow TawnyAlexander on Twitter

Saturday, December 10, 2011

Homemade Marshmallows

Homemade marshmallows are a cinch to make. I'm not a fan of eating them plain straight out of the bag (and that goes for either store bought or homemade), but roasted over a fire or in hot chocolate and i'm all over it. I thought this homemade version made hot chocolate super creamy and delicious, more so than the store bought ones. In fact, since making these I keep finding myself making hot chocolate just for the melted creaminess of the marshmallows. The recipe makes plenty so be prepared to share!

Homemade Marshmallows

The Smitten Kitchen


Makes about 96 1-inch cubed marshmallows

Ingredients:
About 1 cup confectioners’ sugar

3 1/2 envelopes (2 tablespoons plus 2 1/2 teaspoons) unflavored gelatin

1 cup cold water, divided

2 cups granulated sugar

1/2 cup light corn syrup

1/4 teaspoon salt

2 large egg whites or reconstituted powdered egg whites

1 tablespoon vanilla


Directions:

Oil bottom and sides of a 13- by 9- by 2-inch rectangular metal baking pan and dust bottom and sides with some confectioners’ sugar.
In bowl of a standing electric mixer or in a large bowl sprinkle gelatin over 1/2 cup cold cold water, and let stand to soften.
In a 3-quart heavy saucepan cook granulated sugar, corn syrup, second 1/2 cup of cold water, and salt over low heat, stirring with a wooden spoon, until sugar is dissolved. Increase heat to moderate and boil mixture, without stirring, until a candy or digital thermometer registers 240°F, about 12 minutes. Remove pan from heat and pour sugar mixture over gelatin mixture, stirring until gelatin is dissolved.
With standing or a hand-held electric mixer beat mixture on high speed until white, thick, and nearly tripled in volume, about six minutes if using standing mixer or about 10 minutes if using hand-held mixer.

In separate medium bowl with cleaned beaters beat egg whites until they just hold stiff peaks. Beat whites and vanilla (or your choice of flavoring) into sugar mixture until just combined. Pour mixture into baking pan and don’t fret if you don’t get it all out. Sift 1/4 cup confectioners sugar evenly over top. Chill marshmallow, uncovered, until firm, at least three hours, and up to one day.
Run a thin knife around edges of pan and invert pan onto a large cutting board. Lifting up one corner of inverted pan, with fingers loosen marshmallow and ease onto cutting board. With a large knife trim edges of marshmallow and cut marshmallow into roughly one-inch cubes. Sift remaining confectioners’ sugar back into your now-empty baking pan, and roll the marshmallows through it, on all six sides, before shaking off the excess and packing them away.
Do ahead: Marshmallows keep in an airtight container at cool room temperature 1 week.
Follow TawnyAlexander on Twitter

Thursday, December 8, 2011

Christmas Sugar Cookies

It's Christmas time, what better time to decorate cookies? I wanted to try my hand at decorating sugar cookies with royal icing again. I think it's a lot of fun, but it's a little difficult to get them to look flawless, as you can tell by mine. It was only my 2nd attempt, so i'm still learning. The "pink" on the trees was supposed to be red. Last time I tinted using a hot pink coloring and I put to much so after drying it turned almost red. This time I had the opposite reaction where I put too little, thinking it would dry a lot darker. Which I guess means next time it should be right on. Atleast I hope. They take some time with all the drying and decorating, but well worth it in the end. I found that the squirt bottles you can purchase for cheap at stores like Michaels help a ton.
The cookie recipe was really good. In fact, Matt kept sneaking the extra cookies, a little more so than normally. The icing..not so much..but that's expected. Not that it was bad, but we're going for presentation over taste on that one.
Here's the sugar cookie recipe and royal icing I used, from Bake at 350.
Now get in the kitchen and show Santa some love!
Follow TawnyAlexander on Twitter

Monday, December 5, 2011

Layered Toffee Cheesecake Pumpkin Pie

They (whoever "they" are) say pie's going to be the new cupcake, I hear. Personally I don't think I would take it that far, but to each their own. As I promised in the last post, here's the other pie I made for Thanksgiving. I'm not into pumpkin pie..at all, really. But layered with the toffee cheesecake and a graham cracker crust turned it into something I could eat (not only eat, but love) without completely submerging it in whipped cream. It also looks pretty fancy too, you would never think it was so easy. Be sure to add this one to your pie list this season.

Toffee Cheesecake Pumpkin Pie
Our Best Bites

I swear I had a picture of the inside.. the bottom layer is the cheesecake with the pumpkin pie on top, they're distinctive layers.

Ingredients:
2 cups cinnamon graham cracker crumbs (just short of 2 sleeves)
1/2 cup (1 stick) butter, melted
2 8-oz packages cream cheese, softened
1/2 cup sugar
1 teaspoon vanilla
5 eggs, at room temperature
1 bag toffee bits
1 15-oz can pumpkin
3/4 cup whipping cream
2/3 cups sugar
1/2 teaspoon ground cinnamon
1/4 teaspoon pumpkin pie seasoning
1/8 teaspoons salt
Cool Whip or sweetened whipped cream for topping

Instructions:
Heat oven to 300 degrees. Spray a 9 or 10″ springform pan with cooking spray. In a small bowl, mix crumbs and butter. Press in bottom of pan. Bake 15 minutes. Remove from oven and set aside.
In large bowl, beat cream cheese, 1/2 cup sugar, and vanilla until smooth. Beat in 2 of the eggs. Stir in 1 cup of the toffee bits. Spread over crust.
In a new bowl, Mix pumpkin, whipping cream, 2/3 cup sugar, the cinnamon, pumpkin pie seasoning, salt and remaining 3 eggs just until blended. Slowly and carefully spoon over cheesecake layer.
Bake for 2 hours or until edge of cheesecake is set at least 2 inches from edge of pan but center still jiggles slightly when moved. Turn oven off; open oven door at least 4 inches. Leave cheesecake in oven 30 minutes. Run spatula around edge of pan. Cool 30 minutes. Refrigerate 6 hours or overnight. Run spatula around edge of pan; remove side of pan. Pipe whipped topping or whipped cream around edges of cheesecake; sprinkle with remaining toffee bits. Follow TawnyAlexander on Twitter