Showing posts with label other. Show all posts

Tuesday, January 31, 2012

Best Chicken Pot Pie

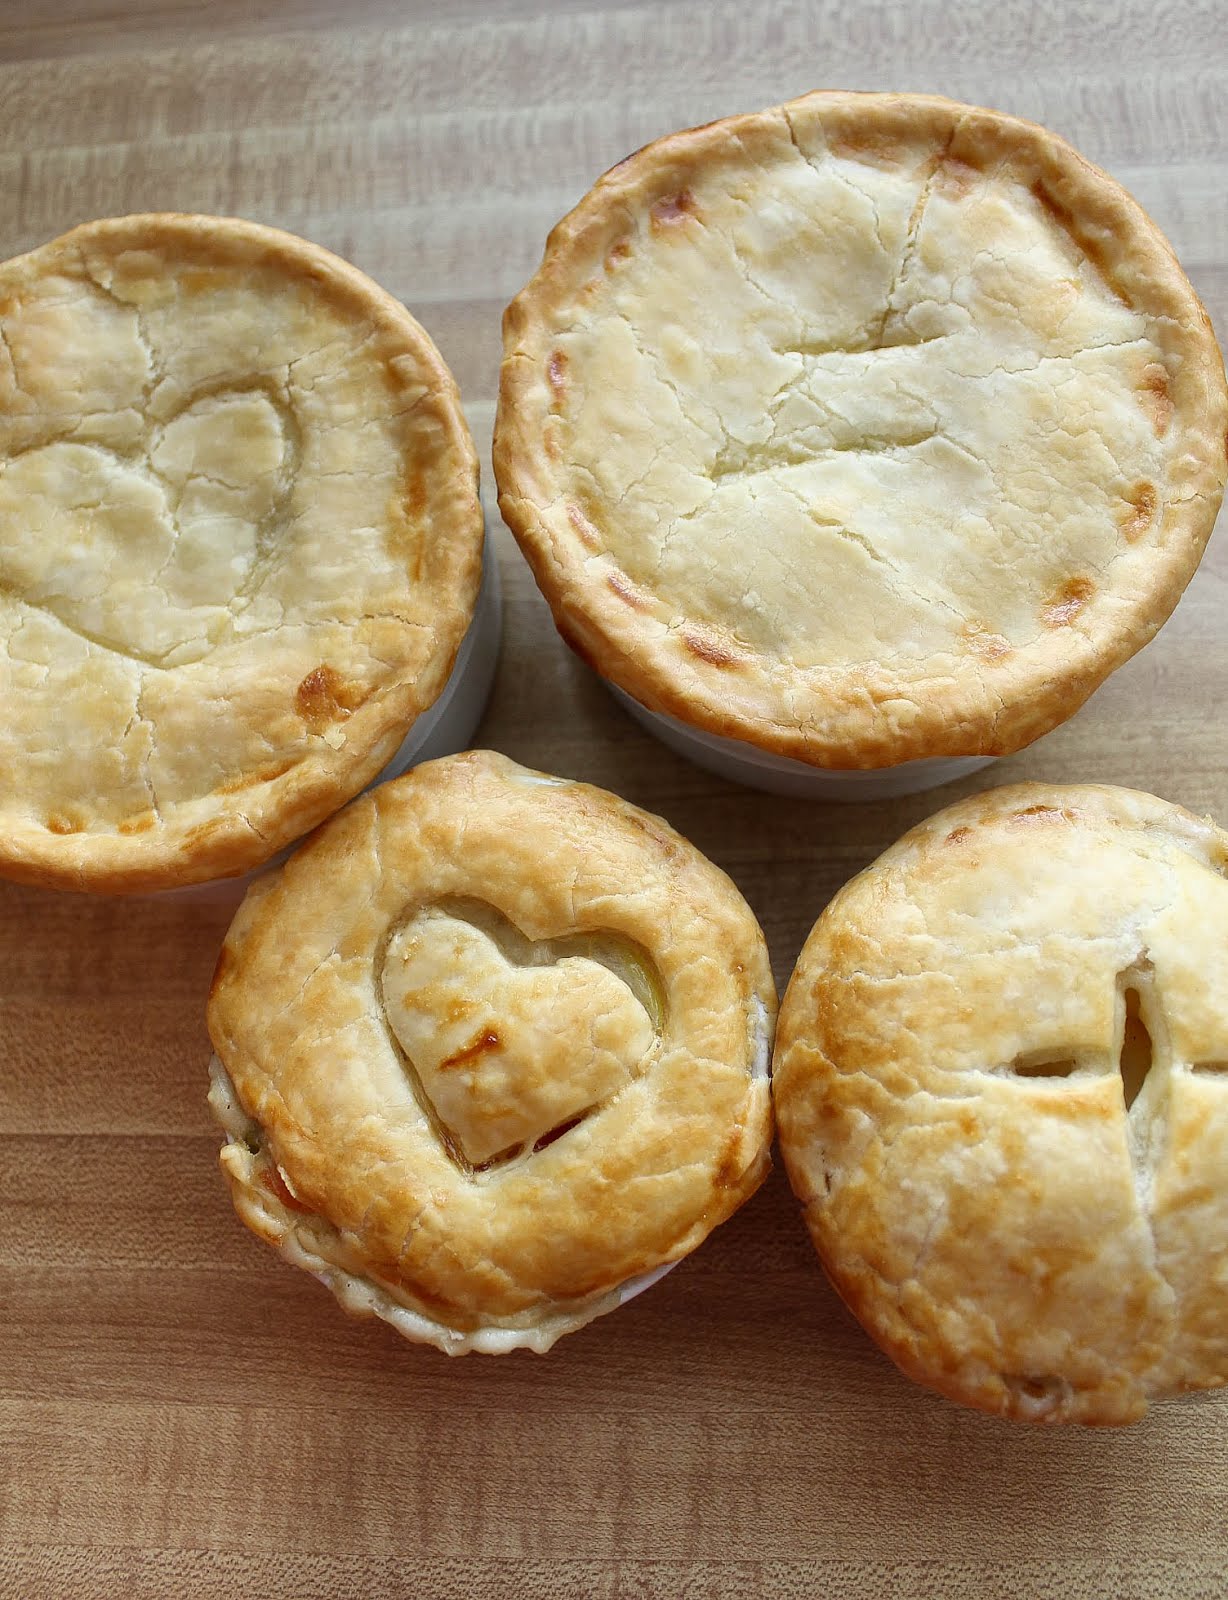
The title says it all, people. I've been meaning to post this one for some time but I just got around to making it again for dinner today. So as I sit here eating it, I can't wait any longer to share this recipe. This really is the best chicken pot pie i've had and I sort of want to make it for everyone I know. You can make this in one large dish or smaller single serving sized ones. I like the smaller dishes because you get more crust to filling ratio. If you make too small though, you'll end up needing another roll of pie crust. Here I did 3 small (3.5 inch/8 oz.) ramekins and 2 larger ones (5 inch) and had the perfect amount of dough to do a bottom layer up the sides and a top. Instead of slits on top, you could also use cookie cutters or just a knife to carve out whatever you'd like. Enjoy!

Best Chicken Pot Pie
I don't remember where I originally saw the recipe, but i'll list as soon as I find it!


Large pie serves 4-5, mini pies serve 6Ingredients:2 homemade or store-bought pie crusts (about 9-inch each)
2 cups water
1 lb. boneless skinless chicken breast, cut into 1/2-inch pieces
2 carrots, peeled and cubed
2 ribs celery, sliced
1 medium onion, chopped
2 tablespoons chicken bouillon granules
1/4 teaspoon black pepper
1/4 cup butter
4 tablespoons cornstarch
1 tablespoon flour
1 cup heavy whipping cream
1 cup frozen peas
1 egg
1 tbsp. water

Directions:In 4-quart saucepot combine water, chicken, carrots, celery and onion. Bring to a boil. Reduce to a simmer and cook 10 minutes, stirring occasionally. Add chicken bouillon, pepper and butter. Dissolve cornstarch and flour into whipping cream and stir into chicken mixture. Simmer 3 minutes, stirring frequently until thickened. Add peas and set aside.
Roll out two 9-inch pie crusts. I roll them out a little thinner to get more out of it. Place bottom crust into six ramekins or one 9-inch pie plate, and shape with your fingers. I like to extend the bottom crust up the sides to the top.
Pour filling into bottom crust. Roll out top crust; cut slits for steam to escape. Cover filling with top crust. Seal crusts and wave edge with your fingers. Whisk egg with water, and brush top crust with egg wash. Place on a foil lined baking sheet and bake in a 400 degree oven for 35-40 minutes, or until the crust is golden brown and filling is bubbling. If top crust is browning too quickly, cover loosely with aluminium foil. Let stand 15-20 minutes before serving.
Follow TawnyAlexander on Twitter

Friday, January 20, 2012

Blueberry Pecan Coconut Breakfast Quinoa

I'm always looking for new ways to use quinoa. I don't have many recipes with it yet that we really like and i'm even more limited since Matt doesn't like it cold. I haven't got his opinion on this one yet because he hasn't tried it, but he doesn't care much for coconut so I don't know how it's going to go over. And he says he isn't picky... :) I'm going to be honest..I don't love quinoa. It's good, but in most cases I find it pretty bland. But i'm reallly trying to love it seeing how it's all the rage these days. With that said, I thought this was a good one. As soon as I made it I had a few bowls. This is the first time I tried a breakfast version and I kept thinking it should be oatmeal. You could use whatever fruit/nuts you wanted, these are just what I happened to have. I have another breakfast recipe that hopefully i'll be posting next week, if all goes well, that i've been dying to try all week!
Blueberry Pecan Coconut Breakfast Quinoa
Beantown Baker


Ingredients:
2 cups milk
1 cup uncooked quinoa
pinch salt
2-3 Tbsp dark brown sugar
1/2 tsp ground cinnamon
1 cup fresh blueberries
1/2 cup chopped, toasted pecans
1/4 cup toasted unsweetened coconut

Directions:
Bring milk to a boil in a small saucepan. Milk will boil and bubble over very quickly, so keep an eye on it. Add quinoa and salt, and return to a boil. Reduce heat to low, and simmer, covered, until three-quarters of the milk has been absorbed, about 15 minutes. Stir in brown sugar and cinnamon. Cook, covered, until almost all the milk has been absorbed, about 5 minutes. Stir in blueberries, nuts, and coconut. Cook until warmed through, about one minute more. Follow TawnyAlexander on Twitter

Monday, December 12, 2011

Peanut Butter Cups

Matt's favorite candy is peanut butter cups, so I knew eventually I would try my hand at a homemade version. I was pleasantly surprised with how close these tasted to the real thing. Even the texture was pretty spot on. The biggest things I noticed were that the real Reese's pb cups taste saltier and the pb to chocolate ratio was just a tad more in this version. Overall, they turned out great and my plans to share them..well, atleast I had good intentions.
Peanut Butter Cups
Brown Eyed Baker

Yield: About 3 dozen peanut butter cups
Prep Time: 45 minutes Chill Time: 1 hour, total

Ingredients:
1 cups creamy peanut butter
¼ cup unsalted butter
¼ cup light brown sugar
1¼ cups powdered sugar
4 cups milk chocolate chips (two 11.5-oz bags)
¼ cup vegetable shortening

Directions:
1. Line a mini-muffin tin with paper liners; set aside. Line a baking with parchment paper; set aside.
2. In a medium saucepan, combine the peanut butter, butter and brown sugar over medium heat. Heat until completely melted and starting to bubble a little, stirring constantly. Remove from the heat. Add the powdered sugar a ¼ cup at a time, stirring until completely combined with the peanut butter mixture after each addition. Set aside and let cool.
3. Meanwhile, melt the chocolate chips and shortening together in the microwave on 50% power in 30-second increments, until completely melted, stirring after each burst.
4. Using a small cookie scoop or a couple of teaspoons, spoon melted chocolate into the bottom of each lined muffin cup.
5. Use a heaping teaspoon to scoop out the peanut butter mixture. Roll it into a ball, and then flatten it slightly into a disk. Place on the prepared baking sheet lined with parchment paper. Once finished with all of the peanut butter mixture, refrigerate both the muffin tins and the peanut butter patties for about 30 minutes.
6. Place a peanut butter patty on top of each chocolate-lined muffin tin. Then use a scoop or spoon to add more melted chocolate on top and around each peanut butter patty.
7. Refrigerate again for 30 minutes, then they’re ready to serve! Store in the refrigerator or freezer. You can keep at room temperature in an airtight container if you’re going to serve them the same day, but they’ll start to get soft if not at cool room temperature Follow TawnyAlexander on Twitter

Saturday, December 10, 2011

Homemade Marshmallows

Homemade marshmallows are a cinch to make. I'm not a fan of eating them plain straight out of the bag (and that goes for either store bought or homemade), but roasted over a fire or in hot chocolate and i'm all over it. I thought this homemade version made hot chocolate super creamy and delicious, more so than the store bought ones. In fact, since making these I keep finding myself making hot chocolate just for the melted creaminess of the marshmallows. The recipe makes plenty so be prepared to share!

Homemade Marshmallows

The Smitten Kitchen


Makes about 96 1-inch cubed marshmallows

Ingredients:
About 1 cup confectioners’ sugar

3 1/2 envelopes (2 tablespoons plus 2 1/2 teaspoons) unflavored gelatin

1 cup cold water, divided

2 cups granulated sugar

1/2 cup light corn syrup

1/4 teaspoon salt

2 large egg whites or reconstituted powdered egg whites

1 tablespoon vanilla


Directions:

Oil bottom and sides of a 13- by 9- by 2-inch rectangular metal baking pan and dust bottom and sides with some confectioners’ sugar.
In bowl of a standing electric mixer or in a large bowl sprinkle gelatin over 1/2 cup cold cold water, and let stand to soften.
In a 3-quart heavy saucepan cook granulated sugar, corn syrup, second 1/2 cup of cold water, and salt over low heat, stirring with a wooden spoon, until sugar is dissolved. Increase heat to moderate and boil mixture, without stirring, until a candy or digital thermometer registers 240°F, about 12 minutes. Remove pan from heat and pour sugar mixture over gelatin mixture, stirring until gelatin is dissolved.
With standing or a hand-held electric mixer beat mixture on high speed until white, thick, and nearly tripled in volume, about six minutes if using standing mixer or about 10 minutes if using hand-held mixer.

In separate medium bowl with cleaned beaters beat egg whites until they just hold stiff peaks. Beat whites and vanilla (or your choice of flavoring) into sugar mixture until just combined. Pour mixture into baking pan and don’t fret if you don’t get it all out. Sift 1/4 cup confectioners sugar evenly over top. Chill marshmallow, uncovered, until firm, at least three hours, and up to one day.
Run a thin knife around edges of pan and invert pan onto a large cutting board. Lifting up one corner of inverted pan, with fingers loosen marshmallow and ease onto cutting board. With a large knife trim edges of marshmallow and cut marshmallow into roughly one-inch cubes. Sift remaining confectioners’ sugar back into your now-empty baking pan, and roll the marshmallows through it, on all six sides, before shaking off the excess and packing them away.
Do ahead: Marshmallows keep in an airtight container at cool room temperature 1 week.
Follow TawnyAlexander on Twitter

Sunday, November 20, 2011

Skirt Steak Salad with Blue Cheese

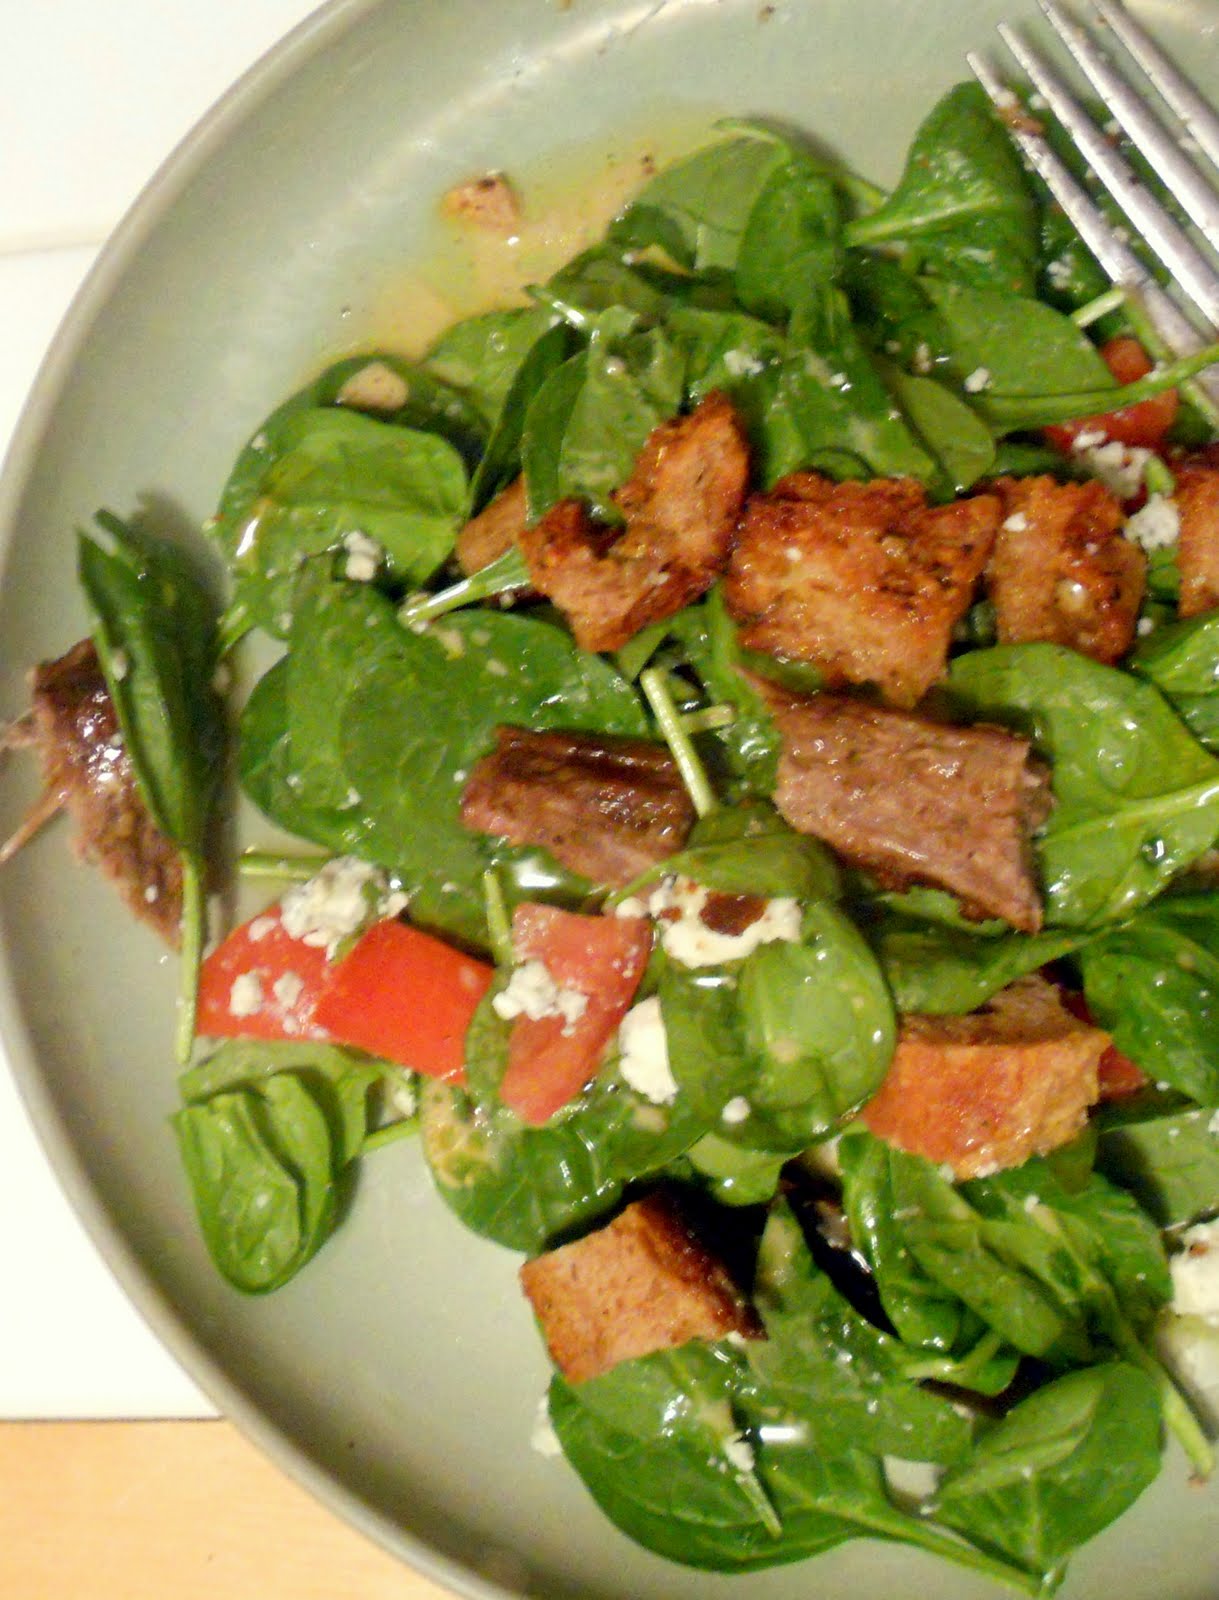
It's a few days before Thanksgiving and I got a cold today. I really hope this is over soon! It's bad enough to be sick, but let's not have it during a holiday, please! Last Thanksgiving I was busy recovering from getting my appendix removed. (Which was the most painful thing i've ever experienced and i'm glad I won't go through again.) On a good note, I got a Kitchen Aid stand mixer!! I scored an awesome deal and i'm very excited about it, if you can imagine. And it's red. That just adds to the awesomeness.
Having nothing to do with baking, here's a salad for ya! I first made this last year and Matt dubbed it one of the best salad's he's ever had. He's a steak guy, if you didn't know. I'm not a blue cheese person (or atleast I didn't think I was..) but I loved it here.
Skirt Steak Salad with Blue Cheese
Smitten Kitchen

Serves 4
Ingredients:
1 pound skirt steak, trimmed of excess fat if necessary, halved crosswise, at room temperature
1 to 2 tablespoons olive oil
1 pint (2 cups) cherry tomatoes, halved
1/2 cup (about 4 ounces) crumbled blue cheese
1/2 pound baby arugula (I used spinach)
Vinaigrette (below)
3 tablespoons minced chives, 2 thinly sliced scallions or 3 tablespoons finely chopped red onion, for garnish

Directions:
Pat steak dry and season on both sides 1/2 teaspoon salt and many grinds of black pepper.

In a cast-iron skillet: Heat skillet on medium-high to high and add olive oil. When oil begins to shimmer, place steak in skillet and do not move it for 5 minutes. Turn it once, and cook for another 3 minutes for medium-rare. You may need to cook your steak halves separately, depending on the size of your pan.

On a grill: Prepare grill for direct-heat cooking over hot charcoal or high heat for gas. Oil grill rack, then grill steak, covered only if using a gas grill, turning once, 4 to 6 minutes total for medium-rare.

Transfer steak to a cutting board and let rest, loosely covered with foil, for five minutes. Arrange arugula on a large platter. Thinly slice steak on the diagonal, across the grain. Arrange over arugula then toss with tomatoes and blue cheese. Add viniagrette to taste and sprinkle on chives.

Steakhouse Mustard Vinaigrette

Ingredients:
1 tablespoon coarse Dijon mustard
2 tablespoons wine vinegar
1/4 teaspoon Worcestershire sauce
1/2 teaspoon honey
1/3 cup olive oil

Directions:
Whisk ingredients. Season with salt and pepper and adjust ingredients to taste Follow TawnyAlexander on Twitter

Monday, November 7, 2011

Pretzel Rods

I wanted a quick snack to take to a girl's night and these were perfect. My favorite thing about them, other than they're super quick and easy to make and are a tasty little snack, is that you can customize them for any occasion. And if you don't want rods, you could just as easily use regular twisted pretzels. Next time I want to try a few other variations, especially one with a caramel drizzle. Options are endless!


Pretzel Rods


What to do: Get a bag of pretzels (rods or twisted) and line a baking sheet with foil or parchment paper. Melt some chopped chocolate, candy melts or almond bark (I used almond bark) and dip the pretzels. If using rods, leave an inch or two of space at the bottom for the handle. If you're going to roll the pretzels in anything like sprinkles, or crushed nuts/candy, do that immediately after dipping so it sticks then place on the baking sheet. When you're finished dipping them all, put in the refrigerator until set. When they're set, you can drizzle over them if you wish, then place back in the fridge until set.


Also, Family Fresh Cooking is giving away a 7 qt. stand Kitchenaid Mixer. Go on over to enter!!

Follow TawnyAlexander on Twitter

Sunday, November 6, 2011

Pumpkin Spice Waffles

I mentioned that I made pumpkin spice pancakes last month, so this time I decided to try waffles. They tasted pretty much the same except one was pancakes, and these are waffles. I chose to post the waffles because I prefer them to pancakes. And if you don't have a waffle maker, I highly suggest you get one. I know..some people will tell you don't bother, it'll sit in the cupboard and you'll never use it, which may be true..but we use ours monthly. And who doesn't love waffles?? Instead of buying frozen waffles, I just make 2 big batches and freeze them, it usually lasts us about a month or two. So here you go, go make yourself some waffles.

Pumpkin Spice Waffles
Tammy's Recipes

Ingredients:
1 cup pumpkin puree
1 1/4 cups buttermilk
1 egg
1/4 cup (4 tablespoons) melted butter
1 3/4 cups flour
1 tablespoon baking powder
1/4 teaspoon salt
1/4 cup sugar
1 teaspoon ground cinnamon
1/8 teaspoon ground ginger
1/8 teaspoon ground cloves
1/8 teaspoon ground nutmeg

Instructions:
1. In a medium mixing bowl, combine the pumpkin puree, buttermilk, egg, and melted butter. Stir to combine.
2. In a large mixing bowl, whisk together the remaining dry ingredients. Add wet ingredients to dry and stir just until moistened.
3. Preheat waffle iron. Spray hot waffle iron with oil or non-stick cooking spray, spoon batter onti iron, and cook until done. One my Belgian waffle maker, these waffles take about 5 minutes to cook fully. The outsides will be browned. Serve waffles hot with maple syrup Follow TawnyAlexander on Twitter

Friday, October 7, 2011

Bloomin Bacon Onion Bread

You may remember the Bloomin Pizza Bread from a couple of months ago. If not, do yourself a favor and go check it out. We really enjoyed it so I decided to make the bloomin onion bread a couple weeks ago. Oh my.. it was a very close competition. I had some bacon in the fridge and thought it would be a lovely addition. And I was so very right. I wasn't expecting to post about it, but after we had it I knew I wanted to share. The part that really surprised me though? The leftovers (which wasn't much) the next day were even better than when I freshly made it! If you're into cheese, green onions, bacon..some of the best stuff in life..add this to your list to make!
Bloomin Bacon Onion Bread
adapted from The Girl Who Ate Everything

Ingredients:
1 unsliced loaf sourdough bread
12-16 ounces Monterey Jack cheese, thinly sliced (I just used pre-shredded cheese)
Bacon-however much your heart desires
1/2 cup butter, melted
1/2 cup finely diced green onion
2 teaspoons poppy seeds

Directions:
Preheat oven to 350 degrees.
Cook bacon and set aside.
Cut the bread lengthwise and widthwise without cutting through the bottom crust. Place on a foil-lined baking sheet. Insert cheese slices between cuts. Combine butter, onion, and poppy seeds. Drizzle over bread. Wrap in foil; place on a baking sheet. Bake at 350 degrees for 15 minutes. Unwrap the bread and sprinkle bacon on top/between slices and bake 10 more minutes, or until cheese is melted. Follow TawnyAlexander on Twitter

Thursday, September 29, 2011

Turkey Pesto Panini

I can only imagine how real Italian food tastes. My brother served a mission for our church in Italy. When he was finished my parents went out there to visit before he came home and unfortunately that was about 2 weeks before I got married. Not wanting to leave my soon-to-be husband for soo long (a week), I decided not to go. What was I thinking?? Right? So now he owes me a trip to Italy. He knows this and actually brings it up often. Last night's dinner was Italian inspired. I've been sick the last couple of days and cooking is on my list of last things I want to do when i'm sick, so panini's it was. You can use whatever kind of sandwhich fillings you like, I used the traditional flavors of fresh mozzarella, basil, pesto and turkey (my husband opted for pancetta). I also bought some smore's gelato cause hey, it's Italian night, i'm sick, and I have a thing for smore's.
P.S.- you don't need any fancy panini press to make the sandwhich.

Turkey Pesto Panini

Ingredients:
Bread- you can use whatever type you prefer, I had a loaf of sliced sourdough that I used and it was great.
Fresh mozzarella, sliced
Pesto- homemade or store bought. I went the store bought route.
Turkey
Fresh basil (optional)
Butter

Directions:
Preheat grill pan, or skillet.
Spread a layer of pesto on one slice of bread.
Top with mozzarella, turkey and basil then top with another slice of bread.
Butter the outside of top slice of bread then lay buttered side down in preheated pan.
Using another skillet, place it on top of sandwhich and press down slightly.
Cook until golden brown then remove skillet and butter the slice of bread facing up then flip sandwhich over.
Replace skillet back on top of sandwhich and grill other side until golden brown. Follow TawnyAlexander on Twitter

Monday, August 15, 2011

Catching Up

First off, i'm loving the produce I get to pick from my garden everyday. I usually get a few tomatoes everyday and today I found a monster zucchini in there and a hidden cucumber, our first one! It's a little difficult finding stuff in the garden because we have a raspberry bush that is taking the area over.

With that out of the way, we had Landon's baby blessing the weekend before last and I meant to take pictures of everything. It was a lot of fun but with all the commotion I didn't get around to it. So instead of posting individual recipes i'm just going to post photos and recipe links.

The first thing I made were oreo brownies. No recipe needed really. I just made brownies and added about 12 chopped up oreos to the batter, then drizzled them with melted white chocolate after they cooked.

Next up are baby blueberry pies from Dinner With Julie. I didn't make the maple vanilla ice cream but I did make them in a mini muffin pan and added a lattice top to some of them with the extra dough I had. The ones with the top looked a lot cuter, like tiny little pies. I've also made mini cherry pies since as well.

Then there's vanilla bean cupcakes from My Baking Addiction. If you're into the classic vanilla on vanilla, this recipe is for you. I also made these ones mini. With several different dessert selections it's nice to have mini versions so you can try more things.


Last weekend we had a church dinner so I took a Reese's peanut butter cup cake. I've been wanting to make it for a while but needed the occassion. I don't get to make cakes often enough.. I was thinking this cake would be a lot bigger than it was and was slightly dissappointed that it wasn't. I was only thinking that because on the site I got the recipe from the cake looked huge! But they must have doubled it for theirs or something.. Anyway it was still really good! Can't go wrong with chocolate and pb, right?


Recipe for the cake and frosting can be found on Annie's Eats.


These recipes really deserve their own post seeing as how wonderful they all are, but I think i'm pretty caught up now.

Follow TawnyAlexander on Twitter

Wednesday, August 3, 2011

Bloomin Pizza Bread

I have things to post, but it's hard finding the time to do it. And honestly, i'm trying to keep my eyes open at the moment. Going from 1 kid to 2 I feel like i'm soo much busier now than I was before! Not that I really am..it just takes so long to get things done and the day's over before I know it. Which is why simple and quick meals are so great. As soon as I saw this loaf of deliciousness I had to make it soon. So when Friday night (party night) came around, we grabbed a movie and some 'bubbly' and devoured this guy. Yes it was as good as it sounds and I know we'll be having it again for one of our party nights.
*This pizza bread is so versatile you don't really have to stick with a recipe, you can add in whatever you desire.*
Bloomin Pizza Bread
The Girl Who Ate Everything

Ingredients:
1 unsliced round loaf sourdough bread
12-16 ounces mozzarella or Provolone cheese, thinly sliced
1 (3.5 ounce) package pepperoni, halved
3 Tablespoons butter, melted
1/2 teaspoon garlic powder
1/2 teaspoon Italian seasonings
2 Tablespoons Parmesan cheese
pizza/marinara sauce for dipping

Directions:
Preheat oven to 350 degrees. Cut the bread lengthwise and widthwise without cutting through the bottom crust. This can be a little tricky going the second way but the bread is very forgiving.Place bread on a foil-lined baking sheet and insert cheese slices and pepperoni between cuts. Combine butter, garlic powder, and Italian seasonings. Drizzle or brush over bread with a pastry brush. Sprinkle bread with Parmesan cheese. Wrap bread completely in foil and bake at 350 degrees for 15 minutes. Unwrap the bread and bake 10 more minutes, or until cheese is melted and pepperoni is a little crispy. Follow TawnyAlexander on Twitter

Wednesday, April 27, 2011

Stuffed French Toast

I'm so glad it's strawberry season cause i've been on a huge berry kick lately. They had 2 lb. containers on sale for really cheap last week and I bought 4 of them (not all at once), and ate almost all of them by myself. Blackberries have also been on sale and i've been eating a ridiculous amount of those as well..to the point of making myself sick once.
I wanted to make breakfast on Easter and I also wanted to use some of our strawberries, and I thought stuffed french toast sounded perfect. Matt's usually the french toast maker in our house but I wanted to give it a try this time. This was really so easy to make and I loved it! You could use jam or fresh berries of your choice in the filling or a combo of them both, which is what I did. If you're not in the mood for fruit, you could try adding chopped nuts with the cream cheese instead.

Stuffed French Toast
seen on Tasty Kitchen see here for step by step photos


Ingredients:
1 loaf French Bread
3 Tablespoons Any Flavor Fruit Spread (You Can Also Use Jelly, Jam, Fresh Fruit, or a combo. of *fruit and jam- *if using fruit, use about 1/2 c. chopped mixed with 1 TBS. sugar)
½ packages Cream Cheese (4 Oz), At Room Temperature
2 whole Eggs
1 Tablespoon Cinnamon
½ cups Skim Milk

Directions:
Heat skillet or electric griddle to 325 to 350 degrees.
Cut french bread into 2-3 inch wide slices. Then, with a paring knife, go back and cut halfway into each slice, in the center, creating a ‘pocket’ that your fruit mixture can be stuffed into.
If using strawberries, slice and place in bowl with sugar; set aside.
In another bowl, place the room temperature cream cheese and three tablespoons of fruit spread of your choice and combine well.
In a separate bowl, break 2 eggs; add cinnamon and milk and combine well.
Now, take fruit mixture and stuff into the ‘pockets’ of your french bread slices. Place on a baking sheet.
When done stuffing each piece of bread, completely coat each piece in egg mixture. Make sure all sides are covered. Do all pieces before starting to fry.
Put 2 tbsp or less of butter into a hot skillet and melt completely. Add all of the bread to the skillet and cook roughly about 3-6 minutes on each side, until it reaches a nice golden brown. You want to make sure the cream cheese mixture heats through.
Serve with powdered sugar or syrup. Follow TawnyAlexander on Twitter

Sunday, April 24, 2011

Deviled Eggs

Deviled Eggs are a classic Easter dish and great way to use up all those extra hard boiled eggs you have sitting around. These are super easy to whip up taking no time at all. There are a lot of different variations and ways to spruce up the eggs according to your own preference, but here is a great basic recipe that everyone can enjoy.

Deviled Eggs


Ingredients:
6 large eggs

1 TBLS. sour cream

2 TBLS. mayo

1/2 t. distilled white vinegar

1/2 t. dijon mustard

1/4 t. sugar

salt and pepper to taste

paprika (optional)


Directions:

Peel cooled hard boiled eggs and cut in half lengthwise.

Transfer the yolks to a small bowl and mix in remaining ingredients until smooth and combined. Fill the egg white shells with mixture using a spoon or put filling in a ziplock bag with corner snipped off and pipe into shells. Sprinkle with paprika if desired. Cover and refrigerate until ready to serve.
Follow TawnyAlexander on Twitter

Sunday, April 3, 2011

Whole Wheat Pita Chips with Mascarpone-Chive Dip

We just weeded our garden, it's been long over due, but now we're ready to plant some crops! Out staples we usually plant are tomatoes, squash and zucchini since we've had really good luck with all of those (when the pesky animals don't get to them first, atleast). We still have some herbs from last season that we didn't pull out to see if those will come back for us. I didn't realize how many chives we have in there! I wish I would have noticed before buying some at the store for this dip.


It's always nice to have quick appetizer recipes on hand. This makes a good dip for a get together or just for snacking. The flavor is like sour cream and onion, but with bacon! So good. Next time i'll try it with cream cheese instead of mascarpone to see how it compares, especially since the mascarpone was a little pricey. I've never even thought to try making pita chips before and I was surprised how quick and easy it actually was. They were crunchy with great flavor and would also go well with hummus. The original recipe calls for 4 whole pita breads, but I ended up needing more than that to finish off the dip.


Whole Wheat Pita Chips with Mascarpone-Chive Dip


Ingredients:

4-6 whole wheat pita breads- halved

2 TBLS. olive oil

1 t. dried oregano

1/2 t. kosher salt, plus extra for seasoning

1/2 t. pepper, plus more for seasoning

4 strips bacon, cooked until crisp, finely chopped

1 c. (8 oz.) mascarpone cheese, at room temperature

3/4 c. sour cream

1/4 c. chopped fresh chives

Directions:

Place an oven rack in the center of the oven and preheat to 450 degrees F. Cut each pita half into 4 wedges. Arrange the pita wedges in a single layer on a baking sheet. Brush with the oil, then sprinkle with the oregano, salt and pepper. Bake for 5 to 8 minutes until crisp and golden.

In a medium bowl, combine the bacon, mascarpone cheese, sour cream, and chives. Season with salt and pepper, to taste. Transfer the dip to a serving bowl. Arrange the pita chips and dip on a platter and serve.
Follow TawnyAlexander on Twitter

Wednesday, March 30, 2011

Spaghetti and Meatballs

I wasn't planning on posting this. It was just something I had made for dinner...and LOVED and couldn't help but share it. This photo is actually left overs the next day, which by the way are just as delicious, if not better. I've made a few different meatball recipes before but nothing that amazed me. And now I don't know if i'll ever make another meatball recipe since this one is just what I was looking for. The sauce was also really good. It had a little spice (but wasn't spicy) and great flavor. I've never been a fan of jarred pasta sauce; I think it's for the most part bland and i'd rather not eat it. The sauce to noodle ratio in this recipe is really low so if you like your pasta saucey I would suggest either doubling the sauce recipe or not making as many noodles. Another thing is, the recipe says "serves 6." That's an understatement. I made the whole recipe but only cooked half, I froze the other half of the meatballs and sauce to make another night since there's only 2 of us. I had a total of 21 meatballs. Of course how many you have will depend on how big you make yours, but either way it was a lot. We each ate this for 3 meals over a couple days and that's only half of the recipe. So I would say it serves closer to 12. I would still make the whole batch next time though because it's nice to know I have more waiting in the freezer for next time.

Spaghetti and Meatballs


For the meatballs:

1 pound ground pork

1 pound ground beef

1 1/4 cups bread crumbs

2 tablespoons chopped fresh parsley

1/2 cup freshly grated Parmesan cheese

2 teaspoons kosher salt

1/2 teaspoon freshly ground black pepper 1 teaspoon onion powder

1 large egg, beaten

1/2 cup warm water

Vegetable oil

Olive oil


For the sauce:

1 tablespoon olive oil

1 cup chopped onion

2 cloves garlic, minced

1/2 teaspoon red pepper flakes

pinch of sugar

1/2 cup red wine

1 14 ounce can tomato puree

1 14 ounce can diced tomatoes

1 tablespoon fresh parsley, chopped

1 1/2 teaspoons kosher salt

1/2 teaspoon freshly ground black pepper


For serving:

1 1/2 pounds spaghetti noodles

Freshly grated Parmesan


Directions:

To make the meatballs, place the ground meats, bread crumbs, parsley, Parmesan, salt, pepper, onion powder, egg, and 1/2 cup warm water in a large bowl. Mix lightly with a fork. Use your hands to lightly form the meatballs. Place meatballs in the refrigerator for at least one hour to rest. Remove from fridge 30 minutes prior to cooking to allow them to reach room temperature.


To cook the meatballs, pour equal parts olive oil and vegetable oil in a deep frying pan to a depth of 1/4 inch. Brown the meatballs in batches, turning carefully with a fork or spatula to brown all sides. Remove to a paper towel lined plate to drain. When all of the meatballs are browned, discard the oil but do not clean the pan.


To make the sauce, heat the olive oil in the same pan. Saute the onions until translucent and soft, about 10 minutes. Add the garlic and red pepper flakes and cook for 1 minute more. Turn the heat to high and add the wine, using it to deglaze the pan. Continue cooking the wine on high heat for 3 minutes, until most of the liquid has evaporated. Stir in the tomato puree, diced tomatoes, sugar, salt, pepper, and parsley. Return the meatballs to the sauce, cover, and simmer for 25 to 30 minutes until the meatballs are cooked through. Serve over hot, cooked spaghetti and sprinkle with Parmesan. Serves 10-12
Follow TawnyAlexander on Twitter

Sunday, March 13, 2011

Cucumber Sandwiches

This is a really tasty recipe that's great for showers or get togethers. And as a bonus, they're super simple and quick to put together. This recipe could easily be halved, which is what I usually do. I don't know what else to say about it other than try it, you'll like it.
These pictures were also taken by my computer's webcam since my camera was out of town.

Cucumber Sandwiches


Ingredients:
2 loaves of french bread, sliced into 1 in. slices (the skinny loaves, not the fat, puffy ones)
1 8 oz. package cream cheese, softened
1/2 c. mayo
1 .7 package dry Italian salad dressing mix
2 cucumbers, sliced
dried dill weed

Directions:
In a small bowl, combine the cream cheese, mayo and dry salad dressing. Cover and refrigerate atleast 6 hours, or preferably, overnight. Spread mixture onto rounds of french bread and top with cucumber slice. Sprinkle with dill weed.
*Mixture can be kept for up to a week in the fridge to make as many or few as needed at a time.
Follow TawnyAlexander on Twitter

Thursday, February 24, 2011

Olive Garden Chicken Gnocchi Soup

A couple months ago we ate at Olive Garden since we had a gift card for it. I always choose to get soup and this time I noticed a new one on the menu. Well, actually I don't know how 'new' it is since it's been a long time since we've gone there. But either way, new to me. It sounded good so I tried it. I was happy with the choice because I thought it was really good. And I was even happier when I found a copykat recipe online :) This soup tasted just like how I remember, who knows, maybe my memory isn't that accurate, but it's still really good and i'll be making it again. It's really easy to make, especially since I had chopped everything up in advance and cooked the chicken so when I was ready to make the soup most of the work was already done. We ate this with the rest of the rolls from the last post. Gotta have some kind of bread with soup!

Olive Garden Chicken Gnocchi Soup
from copykat via. Pass The Sushi


Ingredients:
1 cup chicken breasts, diced and cooked, or sub. canned chicken/turkey
4 Tbsp butter
4 Tbsp olive oil
1 quart half and half (can also use evap­o­rated milk-i did half of each since i didnt have enough half and half)
1 14 ounce can chicken broth
1/2 cup cel­ery, sliced
1/4 cup flour
2 gar­lic cloves, minced
1 cup car­rots, shredded
1 cup onions (1 medium) diced
1 cup fresh spinach, coarsely chopped (kale would also work well)
1/2 tsp dried thyme
salt and pep­per to taste
dash ground nutmeg
16 ounce pack­age gnocchi

Directions:
In a large ­pot, saute the onion, cel­ery and gar­lic in the but­ter and olive oil. When the onion is clear, add the flour and form a roux. Stir and cook a minute. Add the half and half.

Mean­while in another pan, cook the gnoc­chi.

Add the car­rots and chicken to the ­pot. Stir often and when it gets thicker, add the chicken broth, gnoc­chi, spinach and sea­son­ings. Cover and heat through. Follow TawnyAlexander on Twitter

Tuesday, February 1, 2011

Crockpot Tex Mex Shredded Chicken and Upcoming CSN Review

First of all, I love CSN Stores. If you don't already know, they have over 200 online stores with pretty much everything you can image. Including luggage stores, baby stores, furniture stores, home decor stores, and the list goes on. Just last month I bought a pot rack from CSN Stores and I love it! I have so much more space in my cupboards now and I don't have to dig around in it to find what I need. Plus, it looks great. Anyway, CSN has offered me the opportunity to do a product review for them so be looking forward to that coming up soon!
Another thing I love is easy chicken recipes. We eat chicken a lot around here. Much more than any other meat. So i'm always excited to find new recipes to try. This one makes a great filling for tacos or burritos. Just wrap it up in a tortilla with whatever condiments you want (lettuce, salsa, sour cream, cheese, etc.) and you have a good meal! I for one could eat mexican food just about everyday, it's my absolute favorite.
Crockpot Tex Mex Shredded Chicken
Ingredients:
4 boneless, skinless chicken breasts
1 1/4 teaspoon cumin
1 tablespoon chili powder
1/2 teaspoon coriander
1/4 teaspoon paprika
1 1/2 teaspoon salt
1/2 tsp black pepper
1/3 cup chicken broth
1/3 cup (packed) cilantro leaves, chopped
2 limes
1 large onion, chopped
1 jalapeno, seeded and minced
4 garlic cloves, minced
1 tablespoon olive oil

Directions:
Heat the oil in a medium sized sauté pan. Add the onion and sauté for 5 minutes. Add cumin, chili powder, coriander, paprika and garlic and sauté two more minutes. Deglaze the pan with the chicken broth making sure to scrape up any browned bits. Turn off and set aside.
Sprinkle the chicken with salt and pepper. Add to crock pot. Pour lime juice on top, then add cilantro, jalapeno, and pour the onion and garlic mixture over top.
Cook on low for 3-5 hours, or until cooked through and tender. Remove chicken breasts from the crock pot, shred and place in a bowl. Scoop out the onions and add to the chicken. Depending on the amount of juices produced, you may want to add some or all of the juice back to the shredded chicken. Follow TawnyAlexander on Twitter

Monday, January 17, 2011

PW Cinnamon Rolls

A couple months ago my friend sent me this link for Pioneer Woman's chocolate chip cookie sweet rolls. She hadn't tried them but knows I like chocolate chip cookies and thought I should make them. Well..I did.. and sadly they were not good. They looked great but definitely not something I would make again or give to someone. Or even care to consume myself.
First of all I was upset about the fact that the yield for the recipe says 24 rolls so I was debating if i I wanted to do a half batch or full and decided to do the full batch since I was going through all the effort anyway. THEN proceeding through the recipe it says cut the dough in half and use the other half for something else or make a double batch. What?? (The recipe for the dough for the chocolate chip cookie rolls and the cinnamon rolls are the same, but just worded differently in the directions for the posts). The yield should not say 24 if it's really double that. I'm glad I decided to wait to see how the chocolate chip rolls turned out before using the other half of the dough because I ended up tossing them all! (Except the one I tried.) And also, I followed the directions and amount exactely for the icing and that was another failure. There was way too much liquid, it was like water, even after adding a bunch of extra powdered sugar, then just decided not to waste anymore ingredients on it.
At that point I was glad I had another batch of dough in the fridge even though I had to go through the process again of making more rolls. I made her cinnamon rolls but decided not to make her maple icing to go with it. First of all I didn't have maple flavoring and didn't want to buy it just for this. And second I don't care much for maple icing, I prefer regular good ol' cream cheese frosting on cinnamon rolls. The cinnamon rolls turned out great, it was just a long, frustrating process to get to them! Usually I wait until the rolls have cooled and then frost them but this time I did it while they were still warm so it was more like a glaze. I think I like the thick frosting better, but both are good!

Pioneer Woman's Cinnamon Rolls with Maple Frosting (Go here for the cream cheese frosting that I used)


Ingredients:
1 quart Whole Milk
1 cup Vegetable Oil
1 cup Sugar
2 packages Active Dry Yeast
8 cups (Plus 1 Cup Extra, Separated) All-purpose Flour
1 teaspoon (heaping) Baking Powder
1 teaspoon (scant) Baking Soda
1 Tablespoon (heaping) Salt
Plenty Of Melted Butter
2 cups Sugar
Generous Sprinkling Of Cinnamon

MAPLE FROSTING:
1 bag Powdered Sugar
2 teaspoons Maple Flavoring
½ cups Milk
¼ cups Melted Butter
¼ cups Brewed Coffee
⅛ teaspoons Salt

Directions:
Mix the milk, vegetable oil and sugar in a pan. Scald the mixture (heat until just before the boiling point). Turn off heat and leave to cool 45 minutes to 1 hour. When the mixture is lukewarm to warm, but NOT hot, sprinkle in both packages of Active Dry Yeast. Let this sit for a minute. Then add 8 cups of all-purpose flour. Stir mixture together. Cover and let rise for at least an hour.
After rising for at least an hour, add 1 more cup of flour, the baking powder, baking soda and salt. Stir mixture together. (At this point, you could cover the dough and put it in the fridge until you need it – overnight or even a day or two, if necessary. Just keep your eye on it and if it starts to overflow out of the pan, just punch it down).
When ready to prepare rolls: Sprinkle rolling surface generously with flour. Take half the dough and form a rough rectangle. Then roll the dough thin, maintaining a general rectangular shape. Drizzle 1/2 to 1 cup melted butter over the dough. Now sprinkle 1 cup of sugar over the butter followed by a generous sprinkling of cinnamon.
Now, starting at the opposite end, begin rolling the dough in a neat line toward you. Keep the roll relatively tight as you go. Next, pinch the seam of the roll to seal it.
Spread 1 tablespoon of melted butter in a seven inch round foil cake or pie pan. Then begin cutting the rolls approximately ¾ to 1 inch thick and laying them in the buttered pans.
Repeat this process with the other half of the dough. Let the rolls rise for 20 to 30 minutes, then bake at 375 degrees until light golden brown, about 15 to 18 minutes.
For the frosting, mix together all ingredients listed and stir well until smooth. It should be thick but pourable. Taste and adjust as needed. Generously drizzle over the warm rolls.
Follow TawnyAlexander on Twitter

Wednesday, January 12, 2011

Baked Penne with Roasted Vegetables

Here's another recipe i've had for a while I thought i'd share since I haven't yet. It's very versatile, you can put in whatever vegetables and cheese you want (although fontina is really good!). I didn't have mozzarella or parmesan when I made it this time so I used something else. I never put the mushrooms or peas since I don't like either of those. Be sure to use a good marinara sauce though, it makes all the difference.

Baked Penne with Roasted Vegetables

Ingredients:
2 red peppers, cored and cut into 1-inch wide strips
2 zucchini, quartered lengthwise and cut into 1-inch cubes
2 summer squash, quartered lengthwise and cut into 1-inch cubes
4 cremini mushrooms, halved
1 yellow onion, peeled and sliced into 1-inch strips
1/4 cup extra-virgin olive oil
1 teaspoon salt, divided
1 teaspoon freshly ground black pepper, divided
1 tablespoon dried Italian herb mix or herbs de Provence
1 pound penne pasta
3 cups marinara sauce (store bought or homemade)
1 cup grated fontina cheese
1/2 cup grated smoked mozzarella
1 1/2 cups frozen peas, thawed
1/4 cup grated Parmesan, plus 1/3 cup for topping
2 tablespoons butter, cut into small pieces

Directions:
Preheat the oven to 450 degrees F.
On a baking sheet, toss the peppers, zucchini, squash, mushrooms, and onions with olive oil, 1/2 teaspoon salt, 1/2 teaspoon pepper, and dried herbs. Roast until tender, about 15 minutes.

Meanwhile, bring a large pot of salted water to a boil over high heat. Add the pasta and cook for about 6 minutes. Since you will be cooking the pasta a second time in the oven, you want to make sure the inside is still hard. Drain.

In a large bowl, toss the drained pasta with the roasted vegetables, marinara sauce, cheeses, peas, 1/2 teaspoon salt, and 1/2 teaspoon pepper. Using a wooden spoon, gently mix, until all the pasta is coated with the sauce and the ingredients are combined.

Pour the pasta into a greased 9 by 13-inch pan. Top with the remaining 1/3 cup Parmesan and butter pieces. Bake until top is golden and cheese melts, about 25 minutes.

Follow TawnyAlexander on Twitter