Wednesday, November 17, 2010

Peanut Butter Chewies with Chocolate

I've been slacking lately, I know. The last couple times i've baked it hasn't been anything new to put up. I made these the other day along with some pumpkin shortbread bars that I don't want to talk about (don't u hate when u follow a recipe exactely and it doesn't turn out??). So anyway, I thought these were good, but I probably won't make them again. Unless it's a new recipe im trying, I like to stick with things I really like instead of ones I think that are 'ok'. But that's just me. The source I got this from couldn't stop raving about them which is why I even decided to try it in the first place, because honestly, they didn't sound that good to me. But they're simple to make and also gluten free if that's somethin you're into.

Peanut Butter Chewies with Chocolate


Makes about 3 dozen cookies
Ingredients:
1 cup sugar
1 cup corn syrup
1 jar (18 oz ounce) peanut butter, crunchy or smooth
6 cups corn flakes
3 oz chocolate of your choice
Directions:
Combine sugar and corn syrup in a medium saucepan. Place over medium-high heat and stir until the mixture comes to a full boil.
Remove from heat and stir in the whole jar of peanut butter. Mix well.
Add corn flakes to a large bowl. Pour peanut butter mixture over corn flakes and mix well, taking care to coat all of the corn flakes.
With a tablespoon or cookie scoop, scoop out and form into 1-2 inch balls, depending on your preference, and place them on a cookie sheet lined with parchment or wax paper.
Put the chocolate in a small bowl and melt in the microwave for about 30 seconds. Stir until smooth. Drizzle the melted chocolate over the cookies. I put them in the fridge to cool so the chocolate would harden.
Follow TawnyAlexander on Twitter

Tuesday, November 9, 2010

Pumpkin Cream Cheese Muffins

I love pumpkin. So naturally there was no doubt that I would love these. They are incredibly moist and they're good hot out of the oven or cold from the fridge. I think I might have even liked them better cold when the cream cheese firmed up a little. The crumb topping made waay too much, I didn't even use half of it, so I would reccommend cutting the amounts in half for it. Also, it says the yield is 24, but I ended up with a little batter left over, enough for 3 more without the cream cheese. Which worked out perfectly since Rylee didn't really like the cream cheese. You could also put chopped nuts in the batter or topping if you wish.
Pumpkin Cream Cheese Muffins


Ingredients:
For the filling:
8 oz. cream cheese, softened
1 cup confectioners’ sugar
For the muffins:
3 cups all-purpose flour
1 tsp. ground cinnamon
1 tsp. ground nutmeg
1 tsp. ground cloves
1 tbsp. plus 1 tsp. pumpkin pie spice
1 tsp. salt
1 tsp. baking soda
4 large eggs
2 cups sugar
2 cups pumpkin puree
1¼ cups vegetable oil

For the topping:
½ cup sugar
5 tbsp. flour
1½ tsp. ground cinnamon
4 tbsp. cold unsalted butter, cut into pieces

Directions:
Make the filling by combining the cream cheese and confectioners’ sugar in a medium bowl and mix well until blended and smooth. Transfer the mixture to a piece of plastic wrap and shape into a log about 1½-inches in diameter. Smooth the plastic wrap tightly around the log, and reinforce with a piece of foil. Transfer to the freezer and chill until at least slightly firm, at least 2 hours.

To make the muffins, preheat the oven to 350˚ F. In a medium bowl, combine the flour, cinnamon, nutmeg, cloves, pumpkin pie spice, salt and baking soda; whisk to blend. In another bowl, beat together the eggs, sugar, pumpkin puree and oil. Mix on medium-low speed until blended. With the mixer on low speed, add in the dry ingredients, mixing just until incorporated.

To make the topping, combine the sugar, flour and cinnamon in a small bowl; whisk to blend. Add in the butter pieces and cut into the dry ingredients with a pastry blender or two forks until the mixture is coarse and crumbly. Transfer to the refrigerator until ready to use.

To assemble the muffins, fill each muffin well with a small amount of batter, just enough to cover the bottom of the liner (1-2 tablespoons). Slice the log of cream cheese filling into 24 equal pieces. Place a slice of the cream cheese mixture into each muffin well. Divide the remaining batter among the muffin cups, placing on top of the cream cheese to cover completely. Sprinkle a small amount of the topping mixture over each of the muffin wells.
Bake for 20-25 minutes until toothpick inserted comes out clean. Transfer to a wire rack and let cool completely before serving.
Yield: 24 muffins
Follow TawnyAlexander on Twitter

Wednesday, November 3, 2010

Crescent Rolls

It's been a long time since i've baked, or even cooked for that matter. Atleast a couple of weeks. Today I was actually in the mood to make some crescent rolls. Hopefully soon cooking will be sounding better since I do enjoy it. I asked my mom for her recipe since i've had them and like them and so I gave it a try. This wasn't my first time making crescent rolls, I have a recipe for cheddar herb ones that are really good too. I did a little experimenting with these to see what outcomes I liked best so i'll post the recipe with a couple slight modifications.

Crescent Rolls


Ingredients:
¾ Cup Warm Milk
2 1/2 t. yeast
½ Cup Butter
½ Cup Sugar
1 Teaspoon Salt
2 Eggs
4 Cups Sifted Flour
1 egg slightly beaten
water, about 1 T.
melted butter, about 1 T.

Directions:
Combine warm milk and yeast, set aside. Blend together butter and sugar. Add salt, eggs and milk mixture. Beat in flour.
Cover with damp cloth and let rise until double (about 1 1/2- 2 hours.) OR refrigerate overnight or 24 hours.
Divide dough in half. Roll each half into a circle about 12 in. and cut into 8 wedges (pizza style). Roll each piece up going from the big end to the small then curve edges down to form a crescent shape.
Cover and let rise until double about 1 hour. Mix beaten egg with about 1 T. of water and brush over crescent rolls. Bake until golden brown at 350 for 12-15 minutes, don't overbake or they won't be soft. Brush melted butter over tops immediately after removing from oven.
Makes 16 rolls
Follow TawnyAlexander on Twitter

Sunday, October 31, 2010

CSN Product Review

I mentioned here that I would be doing a product review of a couple items from the CSN Stores. I ordered this Insulated Nonstick Carbon Steel 15.5" x 20" Jumbo Cookie Sheet byFarberware

and this Nonstick Carbon Steel 9" Spring Form byFarberware
My products came very fast, about 3 days after ordering they showed up an in great condition.
I lovee how big the baking sheet is! It's very useful for making large batches of cookies and pizzas. I like that it's rimless so things can slide off the edge. The only thing I don't like is hand washing. Overall, it's a great baking sheet!
This was my first time using a spring form pan and I loved it! I've been wanting one for a while. I made my husband's birthday cake in it and I didn't have to worry at all about anything going wrong trying to flip it. I was able to easily decorate the top while the cake was still in the pan. The pan easly tightens and releases, my cake didn't stick at all and the pan cleaned easily. I would definitely reccommend this spring form pan!
Follow TawnyAlexander on Twitter

Monday, October 25, 2010

Sugar Cookies and Royal Icing

I wanted to try making decorated sugar cookies. Not the typical kinds with frosting and sprinkles, but some 'fancier' ones. Since Matt's sister was having a bridal shower I figured I would make some for that. I even used a cookie cutter that we had from our wedding favors. My friend Monica helped me decorate them (the whole thing is a pretty long process!) which was really nice.
They turned out pretty good, especially since neither of us had made any like this before. I had one color of frosting the perfect hot pink color but then I was pretty dissappointed when it dried as red. I didn't know it would dry so much darker! I'm not going to list the recipes for these, but I will post the links to the ones I used as well as the techniques. The first day I made the cookies and started the monograms. The next morning I finished the monograms then that evening decorated the cookies and let dry overnight. The next day they got packaged.
The cookies tasted good and the icing is pretty much what I expected. Royal icing is for the looks, not the taste. It's not bad, but it's no where near as good as regular frosting. It would also work well to use to build gingerbread houses. If you're going to try something like this, I suggest reading some tutorials and tips first to learn things like how to prevent air bubbles, about the consistency of the frosting and why it matters and also just to learn some cool tricks, etc. Sweetopia and Bake at 350 have some great tips and tutorials. I'm really amazed at what some people can do with these. Although I don't think i'd be able to put so much time into it, even if Rylee did allow it.

Sugar Cookies (I didn't use the icing on this page, only the cookie recipe)
Royal Icing (you can also find recipes that don't use meringue powder, since it's a little pricey. But this is the one I used)

Tutorial on How to Marble Royal Icing (soo easy!)
Monogrammed Cookies tutorial (again, very simple but takes a little patience)


Follow TawnyAlexander on Twitter

Saturday, October 23, 2010

Christmas Wassail

I forgot to get a picture, but it's just an apple cider-like drink. I made this for our Halloween party since it was going to be outside. I just put it on warm in the crockpot and it stayed hot all night. This is the perfect drink for cold nights and reminds me so much of Christmas time.

Christmas Wassail
GoodLife Eats

Ingredients:
2 quarts apple juice
2 cups orange juice
1 1/2 cup 100% cranberry juice
1/2 teaspoon vanilla extract
1/3 cup brown sugar
4 cinnamon sticks
1/4 tsp nutmeg
2 tsp whole cloves

Directions:
Combine all ingredients and bring to a boil. Lower heat to medium-low and simmer for 15 minutes. Turn to low to keep warm or put in a crock-pot on warm to keep all day
Follow TawnyAlexander on Twitter

Thursday, October 21, 2010

Pizza Rolls

It's been a while since I posted anything up. I haven't really felt at all like cooking..or baking! I know, shocking. It's not too hard to guess why though. Just so you know i'm still alive and everything I thought i'd put something up. So, pizza rolls it is.They're really easy and you can change it up however you want. Maybe alfredo sauce, green onions and chicken? Whatever you like. This time I just did pepperoni and some sliced olives. And sauce and cheese of course. I'm also working on something right now that i've never done before, that's quite the little process. But I should be putting that up in a few days. So here's what you do:

Pizza Rolls


1 can of refrigerated pizza dough
toppings (fillings) of your choice (sauce, cheese, pepperoni, chicken, olives, etc..)

Just unfold the dough and roll out into a rectangle about 12" x 8". Cut into 24 squares using a pizza cutter. Spread sauce all over the whole thing then place toppings in individual squares. Once the toppings are placed, take all 4 corners of the square and seal them together. Place seam side down in either a greased 9 in. pie pan or in greased cups of mini muffin pan. Lightly brush tops with melted butter or olive oil then sprinkle a little extra cheese on top. Bake at whatever temp. it says on the can of dough for anywhere between 10-20 min., until lightly golden on top.
Follow TawnyAlexander on Twitter

Monday, October 18, 2010

Chicken Cordon Bleu

I first found this recipe about a year ago and have made it for several people since and everyone has wanted the recipe for it. So when I made this the other day for dinner I figured I would post it. It's pretty simple to do and doesn't take too long to make. I've also made this glutten free once by using corn flake crumbs in place of bread crumbs and some other kind of gluten free flour stuff in place of regular flour. Just remember to dip and pan fry the gluten free ones first if you decide to try it that way! The only part I sometimes have a hard time with is slicing the chicken in half since it's already pounded thin. But it's pretty forgiving and it doesn't really matter how nicely it's cut. Make it, I know you'll like it!
Chicken Cordon Bleu
Emeril Lagasse's Emeril 20-40-60


Serves 4
4 (6-ounce) boneless, skinless chicken breast halves (about 1 1/2 pounds)
1/2 teaspoon coarse salt
1/4 teaspoon freshly ground black pepper
6 ounces sliced Swiss cheese (4 to 6 slices)
4 ounces thinly sliced prosciutto or Black Forest ham
1 cup all-purpose flour
1 tablespoon plus 2 teaspoons Emeril's Original Essence
2 large eggs
2 tablespoons milk
1 cup fine unseasoned dried bread crumbs
3 tablespoons olive oil

Directions:
Cut each piece of chicken in half horizontally and place each piece between 2 sheets of plastic wrap. Using the smooth side of a meat mallet, pound out to a 1/4-inch thickness.
Place the 8 chicken pieces on a baking sheet and sprinkle with salt and pepper. Divide cheese evenly between 4 pieces of chicken. Arrange prosciutto slices evenly over cheese; top with remaining 4 pieces of chicken. Tuck in any cheese or prosciutto that extends over the edges. Secure chicken pieces together using toothpicks along the edges to form a "sandwich."
Preheat oven to 400 degrees. Line a baking sheet with parchment paper; set aside.
Place flour in a shallow dish; season with 1 tablespoon essence. In another shallow dish, mix together eggs and milk using a fork. Place bread crumbs in a third shallow dish; season with remaining 2 teaspoons Essence. Dip a chicken "sandwich" in flour, shaking off any excess. Dip chicken in egg mixture, followed by seasoned breadcrumbs; transfer to a plate. Repeat process with remaining chicken "sandwiches."
Heat olive oil in a large skillet over medium-high heat. Place chicken "sandwiches" in skillet and cook, until browned on one side, about 4 minutes. Turn chicken and cook 2 minutes more.
Transfer to prepared baking sheet and place in oven. Cook until cheese is melted and bubbly and chicken is cooked through, about 4 minutes. Remove toothpicks and serve immediately.
Follow TawnyAlexander on Twitter

Thursday, October 14, 2010

Baked Apple Chips

The best way to slice the apples would be to use a mandoline to get thin, uniform slices. I didn't have one and really wanted to try making these, so I hand sliced them as best I could. I'm not sure if I didn't bake them long enough or what, because mine stayed soft and didn't get crispy. I still wanted to share this recipe though because they were good and maybe it was just something that I did that they didn't get crispy. These smelled really good while they baked. I fit 2 apples one 1 large cooling rack.

Baked Apple Chips

Ingredients:
Apples, washed but not peeled, sliced thin
juice of one lemon
about 5 c. water
cinnamon and sugar - about 1 tablespoon each, mixed together for dusting (optional)
Directions:
Slice your apples to about 1/8 inch in thickness - the slices need to be as even as possible for baking purposes.
Place lemon juice and water in a bowl and dip the slices into the solution and shake off the excess liquid . Place the slices on a cooling rack on a cookie sheet.
Sprinkle them with cinnamon sugar, if desired. Bake at 250 degrees for 45-60 minutes, flip over the slices and bake for 45-60 minutes more, or until crisp
please note: the slices may still feel a little pliable while warm but should crisp up when fully cooled
store the chips in an airtight container for up to three months or longer
Follow TawnyAlexander on Twitter

Monday, October 11, 2010

Candy Bar Cake

You may also know this cake by another name, but around here we're callin it candy bar cake. I asked Matt what kind of cake he wanted for his birthday (not that he really cared what kind it was) but I got him to pick something. He said either a yellow cake with some kind of custard in the middle (aka Boston Cream Pie) or this cake. If you haven't had it before, it's really good, but definitely not going to help you lose weight. I only made 1/2 of the recipe in a 9 in. pan since there's only 2 of us, and it was still a little too much.
Candy Bar Cake


Ingredients:
1 box of chocolate cake mix (or make your own- I made Hershey's Perfectly Chocolate Cake recipe
1 14 oz. can sweetened condensed milk
1 6 oz. jar caramel topping (I used Mrs. Richardson's Butterscotch Caramel sauce, soo good!!)
8 oz. cool whip (I just made whipped cream since i'm not a big fan of cool whip.)
toffee pieces for topping (I used a bag of Heath bits that you find in the baking section)

Directions:
Prepare cake according to directions on box/recipe and bake in 9x13 in. pan. When done, pierce cake all over with fork then pour condensed milk and caramel all over cake. Before serving, top with cool whip and candy pieces. I also poured more caramel sauce over individual slices before serving.
Follow TawnyAlexander on Twitter

Saturday, October 9, 2010

Cocoa Rouge Brownies

I decided to make brownies for Matt to take to school for his birthday. Last year I made cupcakes and it took forever since I needed about 50. I had a can of cocoa rouge from Guittard i've been wanting to try and so decided to try these brownies from Guittard's website. I'm lucky I happened to have enough of all the ingredients because I didn't look at the list before I started making these and I had exactely just enough. And I gotta say, I felt a little disgusted as I was making them. I made a double batch (14 eggs, 6 c. sugar, 6 sticks of butter..) I just had to remind myself that these were for abot 40 people, it's not like 1 or 2 people are eating all of these. They turned out good though, I liked them. They were thick and sturdy and would hold up well as part of a brownie sundae.
Cocoa Rouge Brownies
Guittard


Makes 24 two-inch squares
Ingredients:
1¼ cups E. Guittard Cocoa Rouge (this is a dutch processed cocoa, you could try sub. a diff. brand)
1¼ cups unsifted all-purpose flour
1½ cups unsalted butter (3 sticks)
3 cups sugar
½ teaspoon salt
2 teaspoons vanilla
7 large eggs
2 cups (8 oz) chopped walnuts (optional)

Directions:
Line a 9x13x2-inch pan with foil. Preheat oven to 350ºF. Blend cocoa and flour in a medium bowl until uniform; set aside. Melt butter in large microwave safe bowl for 1-1½ minutes, until melted. Mix in sugar, salt and vanilla with a wooden spoon. Vigorously beat in eggs one at a time until smooth and glossy. Mix in dry ingredients until smooth and free of lumps. Stir in walnuts (if using) and spread into prepared pan. Bake 45-50 minutes or until toothpick inserted in center still has moist crumbs. Cool completely on rack before cutting with a long bladed sharp knife. Follow TawnyAlexander on Twitter

Wednesday, October 6, 2010

Oreo Truffle Cookies

We did a bake sale for the business club at school again. I made NY Times Cookies, Rice Krispies Treats and helped my friend make oreo truffles (they're really easy and really good! I shoulda put the recipe for those up too, but they're popular so you can easily find it if you search.) I'm not sure how many batches were made, but in total there were 155 truffles!! So needless to say, there were tons left over. And it just so happens that I found this recipe! Now we used actual completed truffles in the cookies (the recipe for the cookies doesn't have you complete the truffle- dipping them in chocolate) since we already had them done. I was a little dissappointed with this recipe.. the cookies were good, but nothing special. I was expecting something special since it had an oreo truffle inside, but you couldn't taste it at all, it was pretty much like a normal chocolate chip cookie. I won't be making these again, as it's a lot more work to make truffles and cookies, but it was fun to try and wasn't really extra work since the truffle part was done. So if you have some extra oreo truffles on hand, or just want to give it a try, go for it!
Oreo Truffle Cookies


Ingredients:
2 sticks softened butter
3/4 Cup granulated sugar
3/4 Cup packed brown sugar
2 large eggs
1 Tablespoon pure vanilla
3 1/2 Cups all purpose flour
1/2 teaspoon kosher salt
1 teaspoon baking soda
2 Cups chocolate chips
21 Oreos
3 oz softened cream cheese

Directions:
1. Preheat oven to 350 degrees F. Beat butter and sugars until well combined. Add eggs and vanilla and beat until combined.
2. Place flour, salt and baking soda into a large bowl; mix. Add to wet ingredients along with chocolate chips. Mix until just combined.
3. Place Oreos into a food processor or blender, mix until finely ground. Place into a bowl and mix with cream cheese until dough forms. Take 1 Tablespoon of dough and roll into a ball. Continue until all dough has been rolled, you should get 36 balls, enough for all of the cookie dough.
4. With a large cookie scoop, scoop dough onto a silpat or parchment lined baking sheet. Press a little hole into center of dough and put Oreo Truffle inside, cover cookie dough around Oreo Truffle so it’s hidden in the middle. Bake for 13-15 minutes or until edges of cookies just begin to turn golden brown. Remove and let cool on baking sheet for 5 minutes before transferring to cooling rack. 36 large cookies
Follow TawnyAlexander on Twitter

Monday, October 4, 2010

Double Chocolate M&M Cookies

I went to the store to get some m&ms for these cookies. Not realizing just how huge the pretzel m&ms are, I bought them. They were fine, but I would definitely reccomend the regular plain ones! They still turned out delcious and something I will make (probably many times) again.

Double Chocolate M&M Cookies
My Kitchen Cafe


Ingredients:
1 cup all-purpose flour
1/2 cup unsweetened cocoa powder
1/2 teaspoon baking soda
1/2 teaspoon salt
4 ounces semisweet or milk chocolate, coarsely chopped
1/2 cup (1 stick) butter, cut into eight pieces
3/4 cup M&M’s
1 1/2 cups sugar
2 large eggs
1 teaspoon vanilla
Directions:
Preheat oven to 325 degrees. In a medium bowl, whisk together flour, cocoa powder, baking soda, and salt; set aside.
In a medium microwave-safe bowl, place the chopped chocolate and the butter. Microwave for one minute at 50% power. Stir. Microwave again for one minute at 50% power and stir well. If the chocolate is not fully melted, continue microwaving in 30 second intervals at 50% power until the chocolate and butter are well combined. Let the mixture cool slightly, about 2-3 minutes until it is at room temperature or just slightly warm, but not hot.
In a large bowl, combine the chocolate mixture, sugar, eggs, and vanilla. Mix on medium speed until combined. Gradually mix in flour mixture on low speed. Fold in M&M’s with a wooden spoon.
Line baking sheets with parchment paper or grease them. Drop dough onto baking sheets by tablespoonfuls spacing them about 1 1/2 inches apart. Bake the cookies until they have slightly flattened and there are a few cracks on the surface, about 13-14 minutes. The cookies will still be soft. Let the cookies sit for 2-3 minutes on the baking sheet before removing them to a wire rack to cool completely. These cookies will stay fresh in an airtight container for about 2 days. Makes 2-3 dozen
Follow TawnyAlexander on Twitter

Saturday, October 2, 2010

Double Cookie Dough Ice Cream

I JUST got an ice cream machine. I've never had one, never made ice cream, and I have a file of recipes i've been dying to make. Of course now that summer's over.. but that's ok, ice cream isn't just eaten in the summer (right?). The first one that spoke to me was this double cookie dough ice cream. Normally I like cookie dough, but i'm not a big vanilla fan, it's too boring for me, so cookie dough isn't my favorite. But this isn't vanilla ice cream with cookie dough chunks. This is actual cookie dough flavored ice cream with chunks of cookie dough. This is the best cookie dough ice cream i've ever had, and possibly maybe even the best ice cream i've ever had. If you have an ice cream maker, you need to make this. I will certainly be making this again! The only thing I would do differnt next time is to either use mini chocolate chips (in both dough and ice cream) or chop the chocolate into small pieces. The regular chips are rather large and once they're frozen they're really hard.

Double Cookie Dough Ice Cream
Annie's Eats

Ingredients:
For the cookie dough:
5 tbsp. salted butter, melted (or unsalted butter plus ¼ tsp. salt)
1/3 cup packed light brown sugar
¼ cup flour
½ tsp. vanilla extract
¾ cup chocolate chips

For the ice cream:
3 tbsp. unsalted butter
2 cups heavy cream
2/3 cup dark brown sugar
4 large egg yolks
Pinch of coarse salt
2 tsp. vanilla extract
1½ cups whole milk
1 cup chocolate chips (semisweet or bittersweet)

Directions:
To make the cookie dough, stir together the butter and sugar in a mixing bowl until smooth. Mix in the flour, then the vanilla and chocolate chips. Form the dough into a disk, wrap in plastic wrap and refrigerate until firm. (The dough will look like a runny, gooey mess, but it will firm up and be fine).
To make the ice cream, melt the butter in a medium saucepan over medium-high heat. Continue heating, stirring often, until the butter is a deep golden brown color, being careful not to burn it. Whisk in the heavy cream and heat until simmering. Meanwhile in a medium bowl, whisk together the brown sugar and the egg yolks until pale and fluffy. Once the cream mixture is warm, add a small amount to the bowl with the egg yolks, whisking constantly. Slowly whisk in the rest of the cream. Mix in the salt. Return the egg-cream mixture to the saucepan and heat until just slightly thickened, and the temperature reads 170-175˚ F on an instant-read thermometer. Immediately remove the mixture from the heat and pour through a fine mesh sieve into a bowl. Stir in the vanilla extract and the whole milk. Cover and chill thoroughly in the refrigerator.
Once the mixture is chilled, freeze in an ice cream maker according to the manufacturer’s instructions. Chop the disk of cookie dough into small chunks. As soon as the mixture is done churning, transfer to a bowl or airtight container and stir in the chocolate chips and the chunks of cookie dough. Store in the freezer until firm. Follow TawnyAlexander on Twitter

Thursday, September 30, 2010

Mint Chocolate Pudding Cakes

As promised here's the recipe for mint chocolate pudding cakes. These cakes are really good! If you don't like mint, i'm sure you could just substitute vanilla extract for the peppermint. They only take about 20 minutes start to finish. Not much to say about them other than they're quick, simple and delicious!
Mint Chocolate Pudding Cakes
Simply Recipes


Ingredients:
6 oz. bittersweet or semisweet chocolate, chopped
1/2 c. (1 stick) unsalted butter, cut into 4 pieces
3 large eggs
3 large egg yolks
1/3 c. sugar
1/4 c. all purpose flour
1 1/4 t. peppermint extract
1/4 t. salt

Directions:
Preheat oven to 375 deg F. Generously butter 6 6oz. ramekins. Stir chocolate and butter in heavy small saucepan over low heat until melted and smooth. Remove from heat and cool slightly.
Using electric mixer, beat eggs, egg yolks and 1/3 c. sugar until slightly thickened, abot 5 minutes. Add all purpose and beat until blended. Divide chocolate mixture between ramekins. Place ramekins on baking sheet.
Bake cakes until edges are set but centers look shiny and still move slightly when ramekins are gently shaken, 10-11 minutes (start checking at 9). Remove from oven and let cool for 5-10 min. Either serve as is or run knife around edges and invert onto plate.
Follow TawnyAlexander on Twitter

Wednesday, September 29, 2010

Dark Chocolate Souffles

Before when I would make this sort of thing I would just use a cupcake pan since I didn't have ramekins. But I just got some last week (thanks to an amazing deal) and i'm really excited about them and used them 3 times already. Matt has a name for these things but he wouldn't let me talk about it. So i'm not going to say anything about combining the words Bobby Flay and souffle (which I don't think he really knows what either are). I found this recipe a long time ago (I dont remember where..) and i've made them a couple times. I also have a recipe for some mint chocolate pudding cakes that i'll post up tomorrow. I love little chocolate cakes!!
Dark Chocolate Souffles


Ingredients:
5 oz. dark chocolate (65-72%), chopped
1/2 c. sugar
2 TBSP. milk/cram
2 t. vanilla extract
1 TBSP. all purpose flour
4 large eggs, seperated, at room temperature

Directions:
Preheatoven to 375 deg F. Butter 4 6oz. ramekins and coat with sugar.
Melt the chocolate in a large mixing bowl and whisk in sugar, milk and vanilla. Mixture will be thick and pasty. Beat in the eggs yolks one at a time, followed by the flour.
In a medium mixing bowl, beat the eggs whites to soft peaks. Whisk 1/3 of the beaten eggs whites into te chocolate mixture to lighten it. Fold in the remaining egg whites in 2 additions, folding until mixture is uniform and no streaks of egg whites remain.
Divide batter evenly into prepared ramekins and place on baking sheet. Bake for about 15 minutes, until souffles are well risen and set at the edes. Center may appear wet, but should still be set. Serve immediately.
Makes 4 Follow TawnyAlexander on Twitter

Monday, September 27, 2010

Frozen Hot Chocolate

What's with this weather?? It's been hotter the last couple of days, now that it's fall, than it has almost all summer! Simple to make and delicious to drink, this beverage is a perfect mix of summer and fall and appropriate for any season. I gave Rylee a sip and she kept wanting more! I also added about 1/2 t. of pumpkin pie spice and it was really good in it.

Frozen Hot Chocolate
mels kitchen cafe


Serves 4
Ingredients:
4 ounces of your favorite chocolate (I used semi-sweet chocolate chips)
2 teaspoons store-bought hot chocolate powder
1 1/2 tablespoons sugar
1 1/2 cups milk
3 cups ice cubes
slightly sweetened whipped cream (I didn't have whipped cream and instead used marshmallows which were good but obviously don't melt)
chocolate shavings (optional)

Directions:
Chop chocolate into small pieces and melt in microwave on low heat. Once melted, add hot chocolate mix and sugar, stirring constantly until thoroughly blended. Slowly add 1/2 cup milk, stirring until smooth. Cool to room temperature.
In blender, place the remaining 1 cup milk, room-temperature chocolate mixture and ice. Blend on high speed until smooth and the consistency of a frozen daiquiri. Enjoy! Follow TawnyAlexander on Twitter

Upcoming CSN Review

I want to talk about CSN Stores in case you haven't checked them out. They have over 200 online stores where you could get anything from a bar stool to cookie cutters. I could literally look through the sites all day of stuff I would love to get. I'll be doing a review of a couple of their products.

I've been wanting this for a while now, especially since I only have 1 small baking sheet and sometimes 1 isn't enough..especially when it's small! I also wanted to try a rimless cookie sheet so I can easily slide things off, such as a pizza.
I've never made a cheesecake before.. I do however have a couple recipes i've been wanting to make, but just needed this pan to do it!
I love the selection and prices of CSN Stores so look out for the upcoming review of these products!
Follow TawnyAlexander on Twitter

Sunday, September 26, 2010

Pumpkin Chocolate Chip Bars

If you've ever tried Martha Stewart's recipes you probably know how frustrating they can be. They can either turn out amazing or a total flop. This is one of those amazing ones. Now i'm sharing this recipe early in the season because you might want to make it several times :) I first made these last year and ever since they've been my very favorite pumpkin anything! They're very moist and I love chocolate and pumpkin together. What's with the squashes being perfect with chocolate? The chocolate chip zucchini bread is delicious also! I'm going to try making these next time in a mini muffin pan since they don't have very clean lines when you cut them, unless maybe you wait until they're completely cool (if you can), even at that they probably wont be that clean unless you freeze them until firm. Please don't judge them by the photo as they don't do these much justice.
Pumpkin Chocolate Chip Bars


Makes 24
Ingredients:
2 c. all-purpose flour
1 TBLS. pumpkin-pie spice (if you don't have it, sub. 1 1/2 t. cinnamon, 3/4 t. ginger, 1/2 t. nutmeg and 1/2 t. allspice and cloves; all ground)
1 t. baking soda
3/4 t. salt
1 c. (2 sticks) unsalted butter, room temperate
1 1/4 c. sugar
1 large egg
2 t. vanilla extract
1 c. canned pumpkin puree
1 (12 oz.) package semisweet chocolate chips

Directions:
Preheat oven to 350 deg F. Line bottom and sides of a 9x13 in. baking pan with foil, leaving an overhang on all sides. In a medium bowl, whisk together flour, pie spice, baking soda and salt, set aside.
With an electric mixer, cream butter and sugar on medium-high speed until smooth; beat in egg and vanilla until combined. Beat in pumpkin puree (mixture may appear curdled). Reduce speed to low, and mix dry ingredients until just combined. Fold in chocolate chips.
Spread batter evenly in prepared pan. Bake until edges begin to pull away from sides of pan and a toothpick inserted comes out with just a few moist crumbs attached, 35-40 minutes. Cool completely in pan. Lift out of pan using foil and cut with serrated knife into 24 squares. Follow TawnyAlexander on Twitter

Friday, September 24, 2010

Bread Bowls

These aren't the typical bread bowls, you know, the huge roll of bread with the middle scooped out. Nothing against them, I love them. These ones though are bread that's molded into the shape of a bowl and baked and they definitely make soup better. Don't worry if they're a little shabby, it makes them look more rustic ;)
Bread Bowls
Ingredients:
1 cup warm water (110-115 degrees F)
1 tablespoon sugar
1 teaspoon salt
2 1/4 cups all-purpose flour (I used 50/50 all purpose and whole wheat flour to make it a little healthier..you can use whatever ratio you prefer)
1/2 cup whole wheat flour
2 teaspoons dry yeast
1 egg yolk
1 tablespoon water

Instructions:
1. In mixing bowl, combine water, sugar, and salt.
2. Add flours and yeast. Stir and then knead to make a smooth, slightly sticky dough. Knead for about 5 minutes. Cover and let rest for 10 minutes
3. Grease the outsides of eight 6-ounce custard cups (oven-safe). Place cups upside down on ungreased cookie sheets.
4. Divide dough into 8 equal pieces. Pat or roll each piece into a 5-6 inch circle, on a lightly floured surface (or oil your hands and just form the dough in your hands). Shape dough over the outsides of the greased cups. Allow dough to touch cookie sheet, but not to curl under the edges of the cups.
5. Cover and let rise in a warm place for 20 minutes or until slightly puffy.
6. Pre-heat oven to 375 degrees F. Mix egg yolk and water; brush gently over the bread bowls. Bake for 18-22 minutes, until bread is done and bowls are golden brown. Remove from oven and immediately, carefully remove bread from bowls. (I used oven mitts, since bowls and bread are very hot.)
7. Cool bread bowls upright on wire rack. Yield: 8
Follow TawnyAlexander on Twitter

Thursday, September 23, 2010

Broccoli Cheddar Soup

I made this soup tonight for dinner, as well as the bread bowls (which i'll post next time). It was reallly good! If you like broccoli and cheese soup you will love this. In fact, Matt even said this is his new favorite soup, his previous being clam chowder. Matt liked it super smooth, but I like some chunks in it. You could probably even chop the broccoli and carrots small (or into whatever size you like) and forget the pureeing. This is supposed to be like the soup from Panera Bread, if you've ever had it. I haven't so I can't tell you if it is. While the soup was cooking and the bread was baking the house smelled amazing. Had I of just made some cookies to go with it that would be my smell heaven for sure.
Broccoli Cheddar Soup
Ambers Delectable Delights

Ingredients:
6 tablespoons unsalted butter
1 small onion, chopped
1/4 cup all-purpose flour
2 cups half-and-half
3 cups low-sodium chicken broth
2 bay leaves
1/4 teaspoon freshly grated nutmeg
Kosher salt and freshly ground pepper
4 cups broccoli florets (about 1 head)
1 large carrot, diced
2 1/2 cups (about 8 ounces) grated sharp white and yellow cheddar cheese, plus more for garnish (I just used sharp yellow cheese since I didnt have any white cheddar)
Directions:
Melt the butter in a large Dutch oven or pot over medium heat. Add the onion and cook until tender, about 5 minutes. Whisk in the flour and cook until golden, 3 to 4 minutes, then gradually whisk in the half-and-half until smooth. Add the chicken broth, bay leaves and nutmeg, then season with salt and pepper and bring to a simmer. Reduce the heat to medium-low and cook, uncovered, until thickened, about 20 minutes.
Add the broccoli and carrot to the broth mixture and simmer until tender, about 20 minutes. Discard the bay leaves. Puree the soup in batches in a blender until smooth; you'll still have flecks of carrot and broccoli. Return to the pot. (Or puree the soup in the pot with an immersion blender.) Add the cheese to the soup and whisk over medium heat until melted. Add up to 3/4 cup water if the soup is too thick. Garnish with cheese (I also garnish with fresh cracked pepper and additional broccoli- not pictured).
Follow TawnyAlexander on Twitter

Wednesday, September 22, 2010

Pumpkin Spice Caramel Cookies

We're back!! We had a great, much needed camping trip to Yosemite but now it's good to be back and into the routine of things, especially for Rylee. I know, I come back with another chocolate cookie recipe, but I couldn't resist! Remember how I went to the Ghiradelli Chocolate Festival and was introducted to their new Milk Chocolate Pumpkin Spice Caramel chocolate that's my new favorite? Well I wanted to make a cookie version of the chocolate square since I liked it so much. And now that it's fall the recipe seemed fitting. I've only seen this chocolate at the factory so far but when you see it in stores, try it out. I think the cookie turned out really good and something I would definitely make again.

Chocolate Caramel Pumpkin Spice Cookies


Ingredients:
1 c. butter, softened
1 1/2 c. sugar
2 large eggs
1 t. vanilla ext.
2 c. all-purpose flour
1/2 t. baking soda
1/2 t. salt
1 TBLS. pumpkin pie spice
2/3 c. cocoa powder, unsweetened
2 c. milk chocolate chips
Rolos

Directions:
Preheat oven to 350 deg F. Cream together the butter and sugar until light and fluffy. Add the eggs one at a time then vanilla and mix until smooth.
In a medium bowl, sift together the flour, baking soda, salt, pumpkin pie spice and cocoa powder. Mix flour mixture into butter mixture at low speed until no streaks of flour remain. Stir in chocolate chips.
You may refrigerate dough for about 30 min. so it's easier to handle, although I didn't since I was a little pressed for time (Rylee was sleeping.) Wrap just enough dough around a rolo to completely encase it and place on baking sheet.
Bake for 11 min. until set and just firm at the edges. Cookies should still appear moist. Cool on baking sheet for 4-5 min. then remove to wire rack to cool completely.
Makes about 4 dozen.
Follow TawnyAlexander on Twitter

Saturday, September 18, 2010

Chocolate Chocolate Chip Cookies

This is another great recipe I found on the Guittard website, from David Lebovitz. These cookies are pretty much pure chocolate. They're very rich and moist and go great with a tall glass of milk. The dough is more like a batter and the top of the cookies come out like brownies, crispy and crinkley. I found the title to be a little misleading to me. Yes, they are chocolate and they do have chocoate "chips," but when I think of a chocolate chip cookie, well you know what a chocolate chip cookie is. Just fyi, this isn't your typical chocolate chip cookie with some cocoa in the dough.
I made 2 batches. The first one I refrigerated for 30 min., the dough was still a little sticky but I used it anyway. And flattened as the recipe says. They came out thin and very fragile. The second batch I put the dough in the freezer while the first one baked (about 10 min.) and it came out stiffer. I didn't flatten these and they came out thicker than the first batch and held their shape a lot better. Point being, wait until the dough is stiff (you can try freezing for a few min. like I did). Flatten if you'd like, but I thought it was better not.
Oh yea, and I won't be posting for a few days, but maybe Wednesday or Thursday i'll be back with more goodies.
Chocolate Chocolate Chip Cookies
This recipe comes from Room for Dessert by David Lebovitz, published by HarperCollins Publishers, 1999. David says, "These are the best chocolate cookies I''ve ever made." The recipe calls for a total of 13 ounces of chocolate, for the batter and for the chips.
Makes: About 2 1/2 dozen 2-inch cookies


8 ounces (approximately 1 1/3 cups) E. Guittard 64% L'' Harmonie or 61% Cacao Semisweet Chocolate Wafers, chopped
2 tablespoons (1/4 stick) butter
2 large eggs, at room temperature
7/8 cup sugar
1/2 teaspoon vanilla extract
1/4 cup flour
1/4 teaspoon baking powder
5 ounces (1 scant cup) E. Guittard 64% L'' Harmonie or 61% Cacao Semisweet Chocolate Wafers chocolate, chopped into chips
1/2 cup walnuts, toasted and chopped

1. Melt the eight ounces of chocolate and the butter in a bowl set over a pan of simmering water. 2. When the butter and chocolate have melted, remove from the heat.
3. Using an electric mixer, whip the eggs, sugar, and vanilla at high speed until the mixture is stiff (this takes a few minutes). Stir in the melted chocolate mixture.
4. In another bowl, stir together the flour and baking powder, then add them to the chocolate mixture. Add the chocolate chips and the nuts.
5. Chill the dough until it is firm enough to handle, about 30 minutes.
6. To bake the cookies, position the oven racks in the center and upper part of the oven. Preheat the oven to 350 degrees. Line two baking sheets with parchment paper. Form the dough into 1 1/2-inch rounds* and set them onto the baking sheets spaced about two inches apart. Press each slightly to flatten.
7. Bake for about 9 to 10 minutes, until just set, but still moist and shiny in the center.

* Tip from the Kitchens of E. Guittard: Alternatively, you may shape the dough into logs and then slice to form the cookies. On a lightly floured surface or with the assistance of a sheet of plastic wrap surrounding the dough ball, roll the dough with your hands to form two 8-inch logs, 2 inches in diameter. Wrap the dough logs in plastic and chill until firm, at least 30 minutes. Slice the logs into 1/2-inch-thick cookies, and place them on the baking sheets which have been lined with parchment paper. Bake for about 9 minutes. Remove from the oven while they are still shiny and molten in the center but cooked on the outer edges.
Follow TawnyAlexander on Twitter

Thursday, September 16, 2010

Guittard Milk Chocolate Decadence Cake

Guittard was very generous to me and sent me a big ol box of chocolate! Guittard is local to the bay area and if you've never tried it before, I would suggest you do :) You can find the chocolate chips, which I often use, at most grocery stores. They also have a lot of other products and online ordering available on their website. And there's recipes like this Milk Chocolate Decadence Cake on their website. It's really good, easy to make and tastes a lot like a brownie.

Milk Chocolate Decadence Cake
Ingredients:
3 cups (18 oz) E. Guittard 38% Cacao Milk Chocolate, chopped
1/4 cup water
3 large eggs
1/3 cup sugar
1/3 cup all-purpose flour
Directions:
Preheat oven to 325°F. Line an 8-inch cake pan with parchment. Melt chocolate and water in top of double boiler over low heat, stirring constantly until smooth. Set aside and keep warm.
Beat eggs and sugar on high speed until pale and thick, about 5 minutes. Add melted chocolate and mix on low speed until smooth. Mix in flour just until incorporated. Pour into prepared pan and bake in preheated oven for 45-50 minutes. Top should be puffy and cracked and edges set but center will test wet. Cool on rack.
Loosen cake from pan by running a thin blade around the edges. Invert onto plate.
Cake can be served warm for a runny texture, room temperature for a soft texture, or the next day for a firm texture. This cake also freezes well. Cut with a long bladed knife dipped in hot water and wiped clean before cutting each piece. Yield: 8-inch cake.
Follow TawnyAlexander on Twitter

Wednesday, September 15, 2010

Smore's Brownies & Marshmallows

In honor of an upcoming camping trip, I decided to do this post on smores brownies I found on cookies and cups. And also some smores marshmallows i've seen somewhere before. I never really used to like smores, but now I can't get enough of them! Yea, remember I got a smores sundae from Ghirdadelli and one of my favorite things are smores cookie bars and I also made little mini smores? Don't worry though, i'm not out of smores recipes just yet ;)
Smores Brownies
Ingredients:
6 Hershey Bars (although I only needed about 4..)
1 box brownie mix (or make your own)
2 cups mini marshmallows

For the crust:
1 1/2 cups of crushed graham crackers (approx 12-13 whole graham crackers) PLUS reserved 1/4 cup for garnish
6 T. butter
1/4 cup sugar

Directions:
Preheat to 350. Crush graham crackers.In a bowls combine graham cracker crumbs, sugar and melted butter. Press into bottom of 9x9 (I used 8x8) baking pan using back of spoon to form the crust. Bake crust for 10 min until slightly golden. Meanwhile make your brownie mix and pour brownie batter on top of graham cracker crust and bake according to directions.
About 2 minutes before the brownies are done, remove from oven and lay about 4 Hershey bars on the top followed by the mini marshmallows. Place back in oven for about 2-3 min until marshmallows are puffed and slightly golden. Add a sprinkling of additional crushed graham crackers and you may also garnish with additional Hershey bar pieces. Let cool before cutting into.

Smores Marshmallows
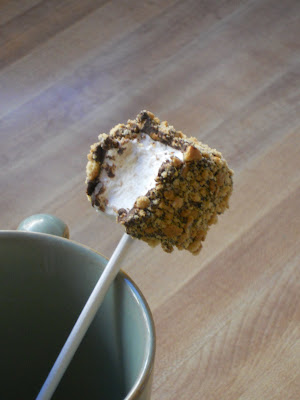
Just put a marshmallow on a stick (such as for a lollipop). Melt some chocolate. Crush some graham crackers and roll the marshmallow in the chocolate followed by graham crackers.


Follow TawnyAlexander on Twitter